Friday 26 May 2017

Otterly obssessed.

Hi everybody,

Jill here, and this week I am going otterly adorable with a peek-a-boo window card...


...featuring the delightful Otterly Adorable from Mama Elephant.


I am otterly obsessed with these amazing creatures, they are soooo cute, sweet, and adorable and best of all...they hold hands with each other when swimming so they don't float away!!!  I mean...gaaaaah *heart bursts into a million pieces*  
So every time I see this sweet set, it just makes me smile and makes me want to ink it right up.

I've spoke before about how obsessed I am with my My Favourite Things Stitched Triple Peek-a-boo die and because there's a ton of different images in the Otterly Adorable set, all doing different things & swimming different ways, I thought it would work perfect to have a little group of them swimming along and 'peeking' through the windows.


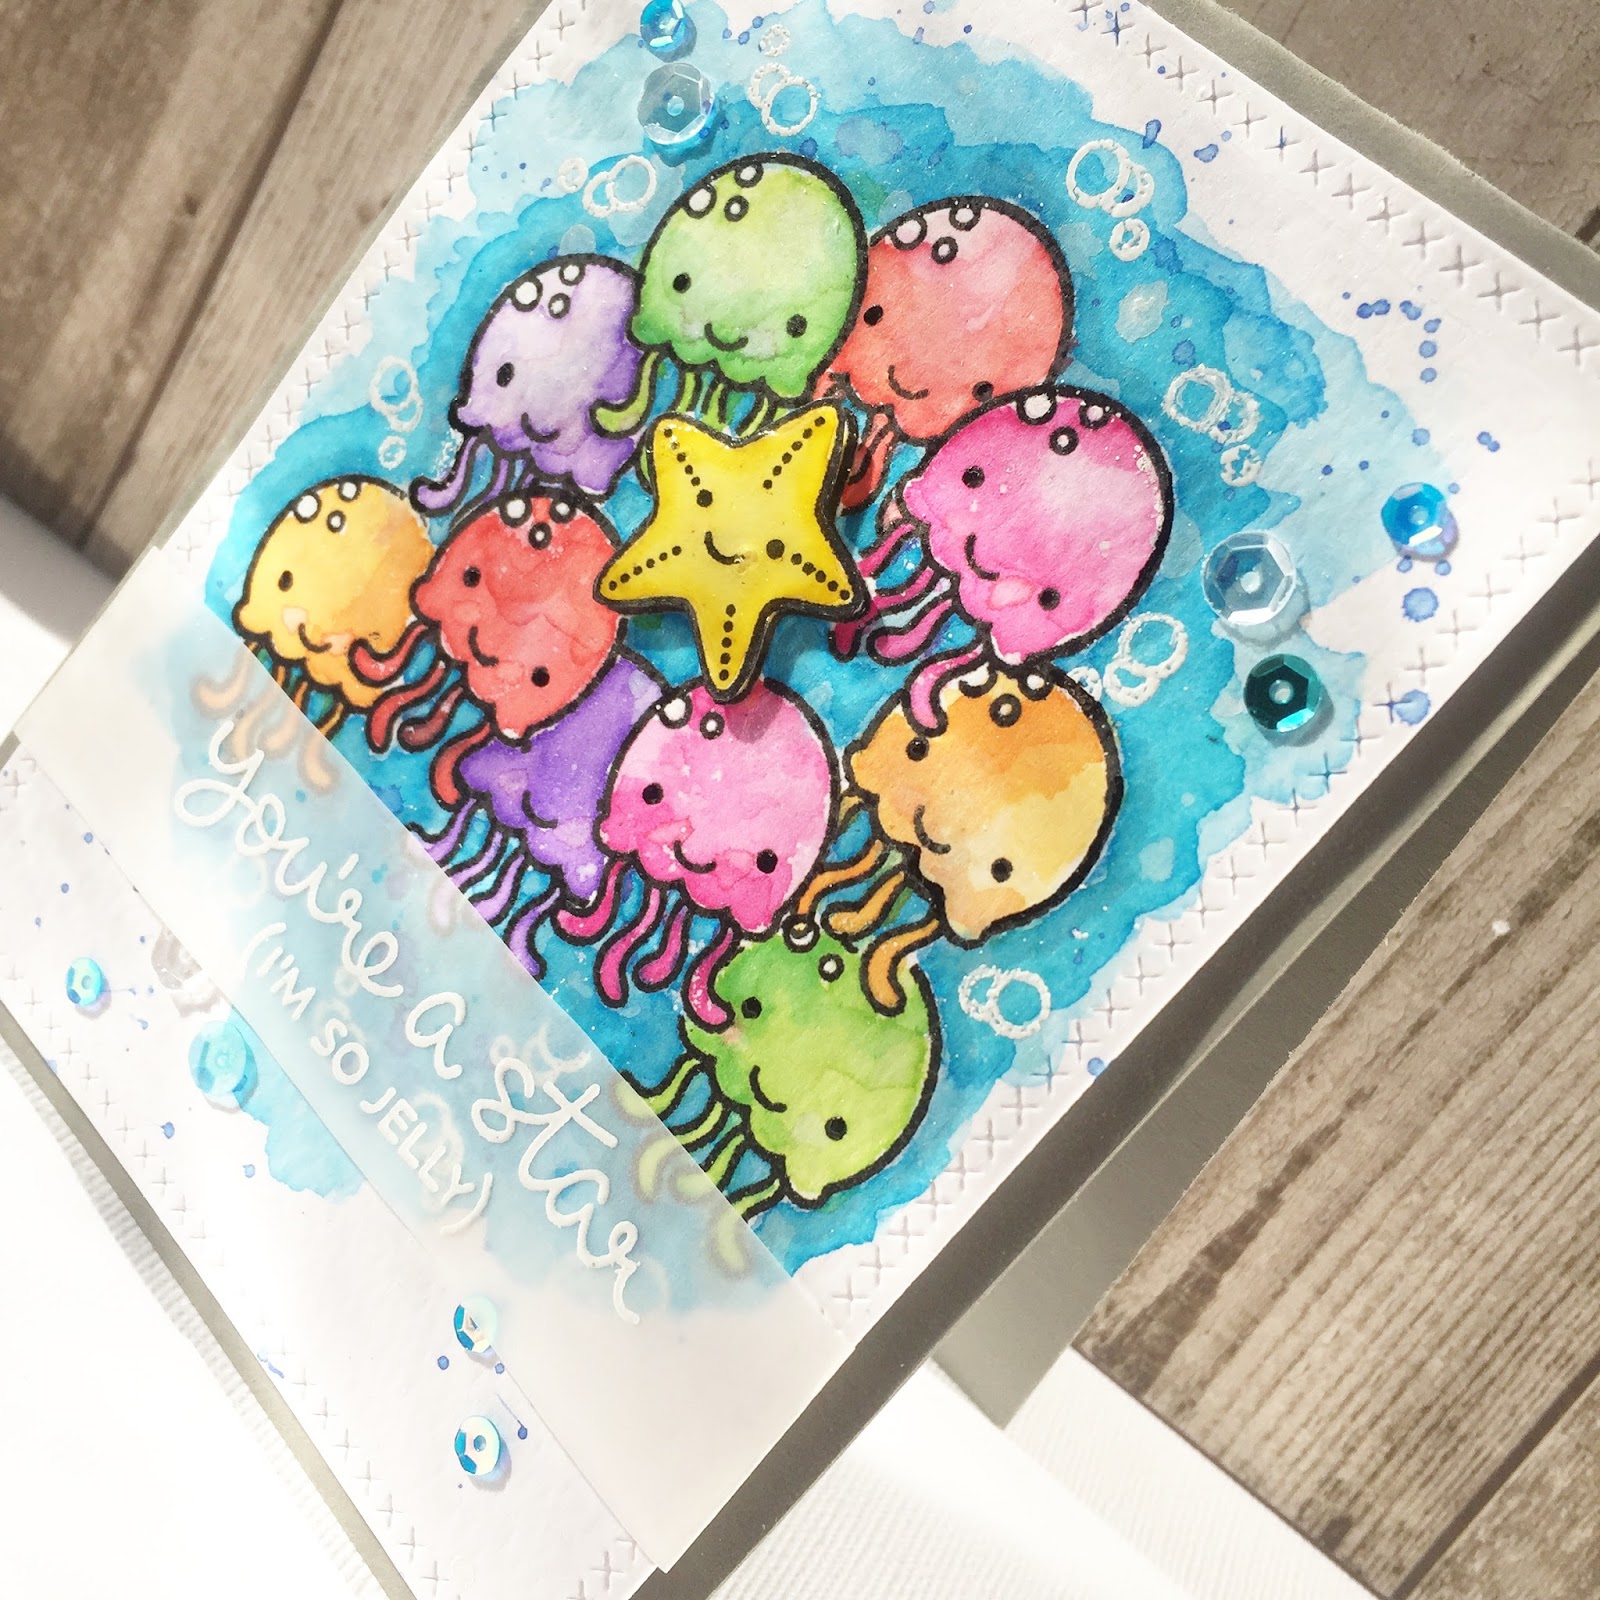
It was a very simple card to make.  I started by colouring a piece of card in sea greens and blues to use as my background and, using the cloud border from Mama Elephant's Landscape Trio dies upside down, cut some waves from it.  I then stamped out all the images I wanted to use and clear heat embossed them so I had a raised edge ready to colour with my Zig Clean Colour Real Brush Pens.  I used them with water to create a watercolour finish.  My sentiment is from the same Otterly Adorable set and is stamped out and heat embossed within the banner from Lawn Fawn's Penelope's Blooms.  To add a little 'something something' to my sentiment banner I inked it up from the back in matching colours to background and waves.


I built up my little scene how I wanted it to look from behind the Peek-a-boo windows using wet glue and foam tape and embellished with a scattering of pretty clear sequins.
I adhered my vellum banner in place by placing a teeny bit of wet glue behind the most bold outlines and letters so that it is barely visible unless you're reeeeeally looking!


I really hope you like it and that these adorable otters make you as happy as they make me!

As always, everything I used is linked below so be sure to stop by.

See you next week.

Jillx

Otterly Adorable    Stitched Triple Peek-a-Boo Windows Dienamic   Zig Clean Color Real Brush Pen (48 piece set)

Friday 19 May 2017

Lil' Baby Story Time

Hi everybody,

Jill here and this week I've got a sweet and simple story for you...


...using Mama Elephant's Lil Painters to help tell the tale.


I don't know about you, but when I get a new stamp set, I like to lavish attention on it as soon as I have it in my hands.  You know, hold it, stare at it, drool over it etc etc...in any case...I was fawning over the adorable Lil Painters from Mama Elephant,when these sweet little images popped out at me as a little story of brand new life that would make a perfect 'new baby' card.


Now I'm not sure if they were intended for this use, but I'm totally claiming the idea as mine haha.
I started by stamping out these three separate images in row, masking them off and adding a few little sprigs of grass.  I  then coloured them using my Zig Real Brush Markers.  Once dry, I masked them off again and stamped Lawn Fawn's Gingham Backdrop set over top in a bright, vibrant bubble-gum pink ink.


I took my sentiment from Mama Elephant's New Family, as it worked perfectly for my card and the font and style worked perfectly with my design, and stamped it out in black ink.
I finished by matting onto a piece of kraft card and mounted the whole thing onto a white card base.
I loved the crisp, cool, CAS design of my card so skipped on embellishments and left it there.


I really hope you like it, and enjoyed my little story time.  I really love it when a stamp set takes you in a totally different direction to what is first apparent!

As always, everything I used is linked below so be sure to drop by and have a peek.

See you next week.

Jillx

Lil' Painters New Family Stamp 

Gingham Backdrops Image 1Zig Clean Color Real Brush Pen (12 piece set)

Friday 12 May 2017

Olde Worlde Bear and Bird.

Hi everybody,

Jill here, and this week I'm going vintage...


... by no-line colouring the delightful Bear and Bird from Waffle Flower in a whole array of brown and beige tones.


I love this effect and thought it would work perfectly with this Bear and Bird set.  I had tried it out using Copics and Watercolours before, so this time I opted to use colour pencils and I not only really enjoyed the process, but also the outcome.


It was a very simple card to make.  I started by stamping out my images in a pale ink so my colour pencils would hide the stamped line.  The beauty of this set is that, not only is it sweet and adorable,  the arches of foliage are already placed together on stamps so it looks like you're placement is amazing and has took you ages, but really...you cheated!  I mean who doesn't love a shortcut :)
Once I had stamped my scene, I coloured the entire thing using coloured pencils in a whole load of browns, beige, and sepia to give this 'olde worlde' vintage look, making one exception for the heart as I thought it would look cool to add one pop of colour.  To finish the effect I created an ink blend across the whole of my card panel, concentrating stronger colours on the edges to create a distressed look.


I stamped my sentiment onto my banner and clear heat embossed, mounted the whole thing onto a dark brown card base, and there you have it.
An olde' worlde' Bear and Bird.


I really hope you like both the card and the effect.

The Bear and Bird set I used is linked below so be sure to have a peek.

See you next week.

Jill

Bear & Bird

Friday 5 May 2017

Are you ready for this Jelly?

Hi everybody,

Jill here, and this week, I don't think you're ready for this jelly ;) ...


...as I bring you a whole load of nice and bright jellyfish using Lawn Fawn's So Jelly set.


I love Lawn Fawn's little mini sets, it never ceases to amaze me how you can make such big scenes with these tiny little sets that, let's face it, cost so little.  Just amazing.
I started by making up a load of masks for the jellyfish and one for the starfish so they were ready to go.  I then went to town on my stamping.  I started with the starfish in the middle, then stamped a ton of jellyfish all around and behind him, heat embossing each one as I went which, yes, was a little fiddly and time consuming, but:  
a)It stops the risk of getting ink all over, and 
b)I knew I wanted to watercolour my images and I find it much easier when the lines are embossed.


Once all my stamping was complete and embossed, I went to town with the colouring using Distress Ink as waterolour.  Once my shoal of cuteness was coloured, I took a few different blues and coloured my back ground,  I really wanted my main images to 'pop' so summoned my inner Kelly Latevola and outlined my images with a grey marker to intensify the shading.


I finished my background by adding a few flicks and splashes for added interest.  I then stamped out, coloured and fussy-cut another starfish image, and added over the top of my scene using foam tape to help it jump from the shoal and the rest of the card.
My sentiment is from the same adorable So Jelly set and is stamped onto vellum and heat embossed in white.  I wrapped my vellum panel around the card so it could be adhered at the back.
I then mounted my piece onto a grey card blank, embellished with a scattering of sequins, and there you have it.


I really hope you like it.
As always, everything I used is linked below.

See you next week.
Jillx


So Jelly Image 1