Friday 25 November 2016

Definitely not Christmas, dinosaurs!

Hi everybody,

Jill here, and this week I am definitely not doing Christmas (it's inescapable, no?), and instead, I'm re-visiting an old classic...


...Paper Smooches Cuteasaurus.


I made this card for a friend of mine who is dinosaur doolally, and what an absolute pleasure it was to ink this set up again.  This was one of my first ever Paper Smooches sets and the beginning of my journey in this awesome hobby we all share, so will always hold a special place in my heart.  I LOVE re-visiting older designs, there's so many cool releases all the time it's easy to get tied up in lusting after the newest sets, but, like many things in life...you just can't beat the old classics!


I decided I wanted to practise my pencil colouring, and opted for kraft card, because, well, I just love the look of it!
I started by stamping out the main element of my sentiment, this 'friend', from Mama Elephant's Friend Indeed, in black Versafine and clear heat embossing.  I then built up the line around and under it with some sprigs of grass, mostly drawn in by hand.  I then masked off accordingly and stamped out the rest of my scene using Paper Smooches Cuteasaurus and, again, masking as I went.
I then coloured my whole scene using colour pencils, adding white accents to the eyes and teeth using a white gel pen.


I finished off my sentiment with this phrase from Mama Elephant's Sunday Sentiments, again stamped in black Versafine and clear heat embossed.  I added a balloon from Mama Elephant's Woodland Gifts, and added it to my little cuteasaurus' hand with a piece of black thread.


I added a slick of Glossy Accents to my balloon, and a wee enamel heart embellishment to finish, and there you have it.

I really hopefully it encourages you to give some of the older sets a glimpse...you might just be missing out on a beautiful old classic :)

See you next week.

Jillx

CuteasaurusFriend Indeed Image 1

Sunday Sentiments Image 1  Woodland Gifts Image 1


Friday 18 November 2016

Soak up the fun in a sea of vellum.

Hi everybody,

Jill here, and this week, I'm making a splash in a sea of vellum...


...using My Favourite Thing's 'Soak Up The Fun'.


I started with an idea to create a circle aperture of coloured vellum waves with these cute sea critters swimming in amongst them, but when I was looking through my circle dies, I came across this absolute beaut, 'Hoop Die', form Neat and Tangled that I hadn't used in a while, and thought it would add a nice little twist on the scene, so opted for that.


I started by cutting a panel using Lawn Fawn's Stitched Rectangles, then cutting the hoop die from it.  I then cut the hoop die again to build the frame up, and in-laid it back in.  I cut strips of vellum using Mama Elephant's Landscape Trio cloud die upside down to create waves and coloured using alcohol markers.  I then adhered these to the back of my hoop aperture, creating pretty wave layers.  I stamped out my critters, coloured using Copics, fussy-cut, and adhered in place, bobbing about on the ocean!


My sentiment is from the same Soak up the Fun set, and is stamped out onto the banner from Avery Elle's Woodland Wonders set, and fussy-cut.  To add a little more interest to my background, I stamped out a load of the little bubbles that come in the set, and filled them with Glossy Accents.


I then mounted my finished panel onto a cream card blank, and there you have it.

I really hope you like it, as always, everything I used is linked below.

See you next week.

Jillx

Soak Up The FunHoop Die Image 1Woodland Wonders


Landscape Trio Creative Cuts Image 1Small Stitched Rectangle Lawn Cuts Image 1


Friday 11 November 2016

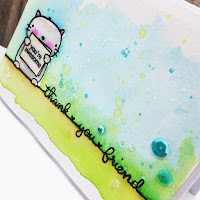
Clean colour cuteness to say 'Thank you, Amigo'!

Hi everybody,

Jill here, and this week, I've got a cute 'Thank You' card coloured with Zig Clean Colour Pens...


...using Mama Elephant's Three Amigo's and Sunday Sentiments.


I made this card for my best friend, and favourite amigo, to say a massive 'Thank you' for doing something extraordinarily kind for me.  I love how this crafty hobby means you can create something to say exactly what you want to, the absolute personal touch that hopefully let's the recipient know how truly special they are to you!
I melded two of the Sunday Sentiments together to make my sentiment just right.


I started by stamping out my cute little kitty form the Three Amigo's set, and masking off.  I then took the 'thank you' sentiment from Sunday Sentiments, only inking it to where the words finished, then took the 'hello friend' sentiment from the same set, and selectively inked that line up also to complete my sentiment.
I used masking fluid to mask off the bottom half of my panel and my wee amigo so I could get a really nice wet wash, using my Zig Clean Colour Pens, for my background without it bleeding where I didn't want it too.  I added a few flicks and splashes across my background before removing thew masking fluid.


I then coloured my kitty and beneath my sentiment line, and stamped my message onto my sign.
Once everything was dry, I embellished with a scattering of pretty sequins, matted onto a card blank, and left it there.


I really hope you like it, and just wanna say, Thank you so much Lynne...this one's for you :)

See you all next week.

Jillx

Three Amigos Image 1Sunday Sentiments Image 1Zig Clean Color Real Brush Pen (24 piece set)


Friday 4 November 2016

Enjoying the ride in a dreamy sky.

Hi everybody

Jill here, and this week, I'm floating off into a dreamy sky...


...with he help of WPlus9's Going Places.


This set is still one of my absolute faves, it is just so adorable.  The only problem with it is trying to choose which of the cute critters to use!


I started by stamping out the clouds across my background and heat embossing in white.  I then washed some pretty blue, pink, & orange Distress Inks across the back, using the heat embossing as a resist, and left to dry.  Once dry, i went back over my clouds with a waterbrush, dabbing up the ink to lift the colour, leaving my clouds much lighter.  I then stamped out my hot air balloon and and bunny, and watercoloured.  This is one of the few sets I have the matching dies for as i felt the were 'must haves'.  They not only cut the inner part of the balloon out, they also the snip around the critters little arms so they can be holding on to the side of the basket. gaaaaah! I mean, how cute is that?!


My sentiment is from the same set, stamped onto a piece of vellum, embossed in clear powder, cut out using the wee banner from Lawn Fawn's Stitched Journaling Card die, then adhered to the back of my balloon so the glue wouldn't show through.
I popped my balloon and little bunny in place using foam adhesive to add some dimension, added a scattering of pretty sequins, and there you have it, a sweet and simple dreamy scene.

I really hope you like it.  As always, everything I have used is linked below.

See you next week.

Jillx

Going Places Image 1Going Places Die Image 1Stitched Journaling Card Image 1