Friday 24 June 2016

A sparkly 'Hello' with a resisit watercolour wash.

Hi everybody,

Jill here, and this week I'm letting the sun lead the way by taking inspiration from some beautiful bright summer colours...


...ultimately aiming for a kind of sun-bleached, chilled out, laid-back vibe.


I started by stamping out this amazing Geometric grid Background Stamp from My Favourite Things on a piece of watercolour card and heat setting in clear embossing powder to act as a resist.  I love a great background stamp, even more than I love a cute critter stamp, and this is my newest favourite!  I'm really looking forward to doing a nice bright ombre wash across it.  It's one of those background stamps that works perfect with watercolour as it has all the little spaces for the colours to become trapped which makes for the coolest effect.  I used some beautiful bright yellows, greens and blues mixed with plenty of water, and washed them across my embossed background allowing my colurs to blend.


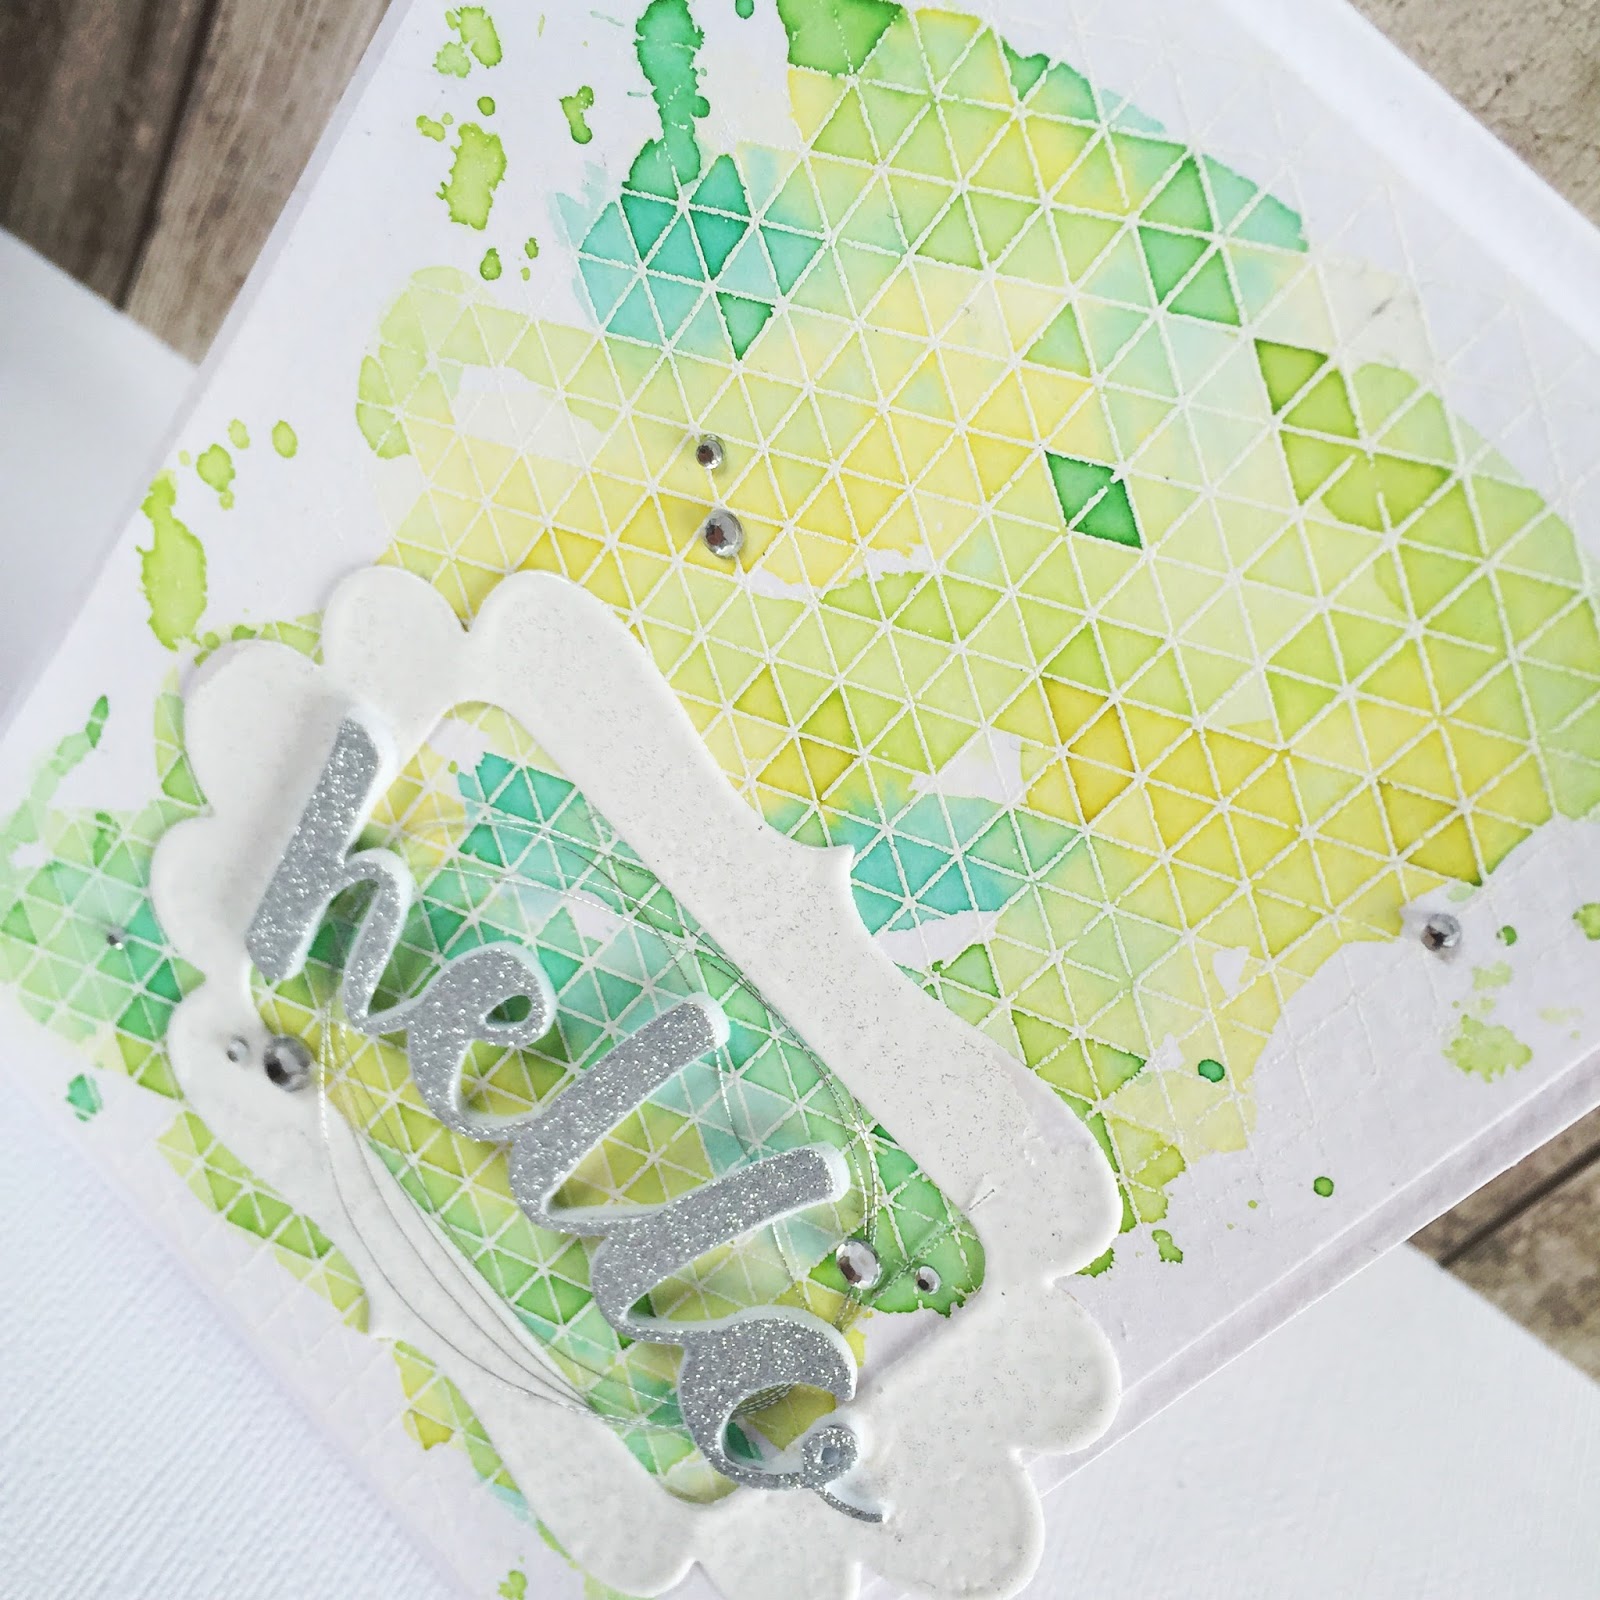
While that was drying, I cut this sweet little Duo Die 1 frame from  Paper Smooches, and white heat embossed the whole piece.  I then cut the 'Hello' form My Favourite Things Hello There Dienamics.  This is another new favourite for me, the font is just perfect, pretty but cool, and you get 'Hi', and 'there' in the set too so really great value for money.  I cut it from a scrap of sparkly silver paper I had in my stash, and a piece of white fun foam, before adhering them together.


I added a twirl of metallic thread and built up my elements on top of my panel, manipulating my 'Hello' die so that it fit nicely across my frame.
I kept things simple by embellishing with a scattering of gems and mounting onto a white card base, then left things there.


I really hope you like it, and as always, everything I used is linked below.

See you all next week.

Jillx

Geometric Grid BackgroundHello There DienamicsDuo Die 1


Friday 17 June 2016

Smile and shimmer with textured Starry Watercolour.

Hi everybody,

Jill here, and this week, I'm shimmering up some texture paste...


...using the ever giving, Gansai Tambi Starry Colours Watercolour set.


This beautiful watercolour set's talents seem to know no bounds, so I was excited to see how they would react with some transparent texture paste, whether the gorgeous shimmer would shine through, and boy oh boy was I thrilled with the results.


Those bad boys shone through like the twinkling magic stardust they are!
I started with a quick watercolour wash (I know, shock horror!), across my background and set to dry.  I then got my Starry Watercolours pan set nice and wet, and added a good amount of product to my craft mat.  I then added a nice dollop of some clear texture paste to it, and mixed it up well.  I used the Hearts Stencil from Echo Park, and smooshed my starry shimmery texture paste over the top using a palette knife making sure not to cover the whole thing, I wanted to cover a corner and kind of fade off leaving some nice white space.


I then cut my 'Smile' sentiment from Lawn Fawn and gave it a couple of coats of gold embossing powder for even more dimension.  I finished my sentiment with this 'it's your birthday' from Lawn Fawn's Year Six, an awesome little cute set worth the money for this sentiment alone - so handy in finishing messages off!  I stamped it onto vellum and, after adding a twirl of metallic thread underneath and the addition of a grey piece of card to ground everything, adhered onto my card front.
I matted onto some patterned paper from my stash, and mounted onto a grey card base, keeping everything up in the corner to help balance my elements out.
I added a wee little black enamel heart to tie everything together and there you have it.


It's hard to show in pictures just how shimmery the Gansai Tambi Starry Watercolours are, but when they catch the light, they really are just utterly stunning, and being able to use them along side so much of your crafty stash just makes them even more worthy of a space in your craft room!

As always, everything I have used is linked below so be sure to go check it out.

See you next week.

Jillx

Gansai Tambi Starry Colours Watercolour Pan Set (6)     Hearts Stencil
   
Scripty Smile Lawn Cuts    Year Six 


Friday 10 June 2016

Sticking with simple.

Hi everybody,

Jill here, and this week, I'm still in the vibe of keeping it simple...


...with some more simple pencil colouring on kraft using the delightfully sweet, My Favourite Things Somebunny.


The Somebunny set is jam packed with cute, sweet images and sentiments, and I decided to make a simple scene using these adorable little chicks.


I stamped out my scene in black and coloured using my colour pencils.  I love the look of pencil on kraft, and really want to practise my 'lighthand' when using them instead of reaching for the blending solution.  I mean, I don't know why, the blending solution works a treat, looks great, and is so easy to use...but of course us crafters like to torture ourselves over getting a technique right, yes?
I wanted my card to be really clean and simple, basic, and naive looking, so kept my scene elements to a minimum, adding a little grassy mound, a couple of balloons from the same Somebunny set, and added a sentiment form Mama Elephant's Woodland gifts set as I just think the font fit so well with the look I was going for.


I cut a couple of layers from cream and kraft card, using Mama Elephant's Index Creative Cuts, added a wrap and bow of natural twine, and matted onto a card base.
Like I say, I was going for a very simple look, so, after adding a slick of Glossy Accents to my little chicks' balloons, left it there.


I really hope you like it.  Everything I used is linked below so be sure to go have a peek.

See you next week.

Jillx


Friday 3 June 2016

Some pencil colouring with Somebunny.

Hi everybody,

Jill here, and this week, I've got some simple pencil colouring...


...using My Favourite Thing's sweet Somebunny set.


I decided it had been too long since I had a good play with my colour pencils, so used them to create and colour my card.  I love the simple naivety you get from using pencils, so decided to colour onto kraft card to add to the organic feel.


I started with a panel of kraft card, cut into sections using Mama elephant's Landscape Trio dies, and Lawn Fawn's Grassy Border die, and coloured each section using my pencils with a little help when needing from some paper stumps and some blending solution.  I then stamped out, coloured and fussy-cut the gorgeous sweet images from My Favourite Things Somebunny.  I also cut and coloured Mama Elephant's Picket Fence to help build up my little scene.


I used Lawn Fawn's Small Cross Stitched Rectangles to give my panel a decorative edge, and stamped out my sentiment, from the same sweet Somebunny set, heat embossing in white powder.  I then matted my piece onto grey card, and mounted onto a card base.
I didn't want to mess with the simplistic look of my card, so skipped on embellishments and left it there.


I really hope you like it, and as always, everything I used is linked below.

See you next week.

Jillx


Somebunny Image 1Landscape Trio Creative Cuts Image 1Grassy Border Die Image 1

Mama Elephant Picket Fence Creative Cuts  Small Cross Stitched Rectangle Lawn Cuts