Friday, 20 May 2016

Create your own inspiration.

Hi everybody,

Jill here, and this week, I'm creating my own Pinterest style inspiration poster!


Using Mama Elephant's Block Party Letters, and the oh so beautiful Gansai Tambi Starry Colours.


You know the sort of thing I mean, they're very 'in' right now, always pretty with some cool fonts or graphics inspiring us to live the best life we can...or dare to dream to in any case.  Well...why not create your own?


I started by stamping out my chosen 'inspirational' quote using Mama Elephant's Block Party Letters and filling/masking them off with drawing gum (I've said it before and I'll say it again - this stuff is a must-have in your stash and if you haven't already tried it - you neeeed to!).  
I love alphabet sets as you can say anything and everything you want to.  It also means you can write sentiments in your own dialect, which for a northerner like me, is amazing (have you ever tried to find a card with 'mam' on it from your mainstream high street store? ...impossible!).  I especially love how these letters are open so your choices on how to colour them are limited only to what you have in your stash, and your own imagination!  I coloured mine using the Gansai Tambi Starry watercolour set as it fit perfect with the image I had in my head of a 'Pinterest' style poster.  Nothing to do with the fact I am in love/obsessed with them and can't put them down :) .


Once my drawing gum was dry, I created a watercolour wash over the background (well, it wouldn't be me if I didn't include a wash somewhere eh?!) and left to dry.  I then gently removed my gum and painted in my letters, like I say, using the absolutely beautiful Gansai Tambi Starry Colours.  The fact you get so many different shades of gold means you can create light and shadows to help with dimension.  I added a good few flicks and splashes of gold across the back and embellished with a scattering of sequins.  I matted my panel onto a piece of card I had gold embossed the edges of, mounted onto an Avery Elle notecard, and there you have it.

Now I did make another card, in exactly the same way (with a little addition of Sketchy Letters & Glossy Accents), for my friend's 40th birthday to emphasise how cool it can be to create your own sentiment saying exactly what you want to say...but forgot to photograph it before sending it!  Doh!  So got my friend to photograph it and send them over haha - and here they are...oh...and Happy 40th Stu :)


I hope you like them, and that they maybe inspire you to get inspirational!

As always, everything I used is linked below.

See you next week.

Jillx

Block Party Letters Image 1  Gansai Tambi Starry Colours Watercolour Pan Set (6)  Midnight Collection Notecards (12 pack) Image 1


Friday, 13 May 2016

A Touch of Tone on Tone...


Hi there,

I'd love to share a card I have made for the current challenge going on over at the always awesome, A Blog Named Hero, and this time round, it's all about 'Tone on Tone'.


And here's my card...


Sometimes, when I haven't got time to get into my craft room to play, I'll write lists of techniques I want to try, and cards I want t make...and a Tone on Tone design was next up on my list of things to try!  So when I saw what the challenge was this month, I was over the moon!


I started by creating a loose watercolour wash on a piece of cardstock using Distress Inks, adding water drops, and flicks of both white and shimmer sprays.  Once dry, I took a heart stencil by Echo Park, and, using the same Distress Inks, lightly blended over the top, fading out from one corner.  I then went back over all my hearts with a wet brush to re-activate the ink and give them a watercolour look, and left to dry.  While that was drying, I inked up another piece of card, using the same tonal inks to use as my back panel.  I took my Hero Arts 'Thank you for being my friend' set, and stamped out this lovely sentiment, onto vellum, and cut into a little flag.  I wrapped some Lawn Fawn twine around my card, and added my vellum over the top using some strategically placed glue, and stapled in place.  I then added a little tie of the same twine just for a sweet little touch.


I added a good scattering of sequins, teeny hearts and stars from a Lucy Abrams mix in my stash, mounted the whole thing onto a card base, and there you have it.

I really hope you like it, I really enjoyed making it and love the tone on tone look!

See you next time.

Jillx


Make some noise!

Hi everybody,

Jill here, and this week, I'm making some real monster noise!


Using the cutest little monsters I ever did see from Mama Elephant's Monster Jam.


This set is from Mama Elephant's latest release, and is like nothing I already owned, so I just had to have it.  There's a few little monsters in the set, all doing something different, with a bunch of sentiments to go alongside them.  Sooooo cute!


I started by lightly pencilling a grid onto my watercolour card as a guide to stamp my monsters, I then took the wee little cutie, who is just kind of standing, and repeatedly stamped him out in all but two of my grid spaces.  I then took this awesome little monster, who's clearly the fun guy in the pack, and stamped him out in my spare space.  I love this repeated image kind of design as it's really simple but looks pretty modern and still packs a punch.


I coloured my images using Zig Clean Colour Real Brush Pens with water, making sure my main noisy little dude really stood out in bright colours.  My sentiment is built up form the same Monster Jam set, and is white heat embossed on black card, then simply cut into strips and added to my card using foam adhesive.  I didn't want to knock the balance of my design off, so skipped any embellishments and left it there.

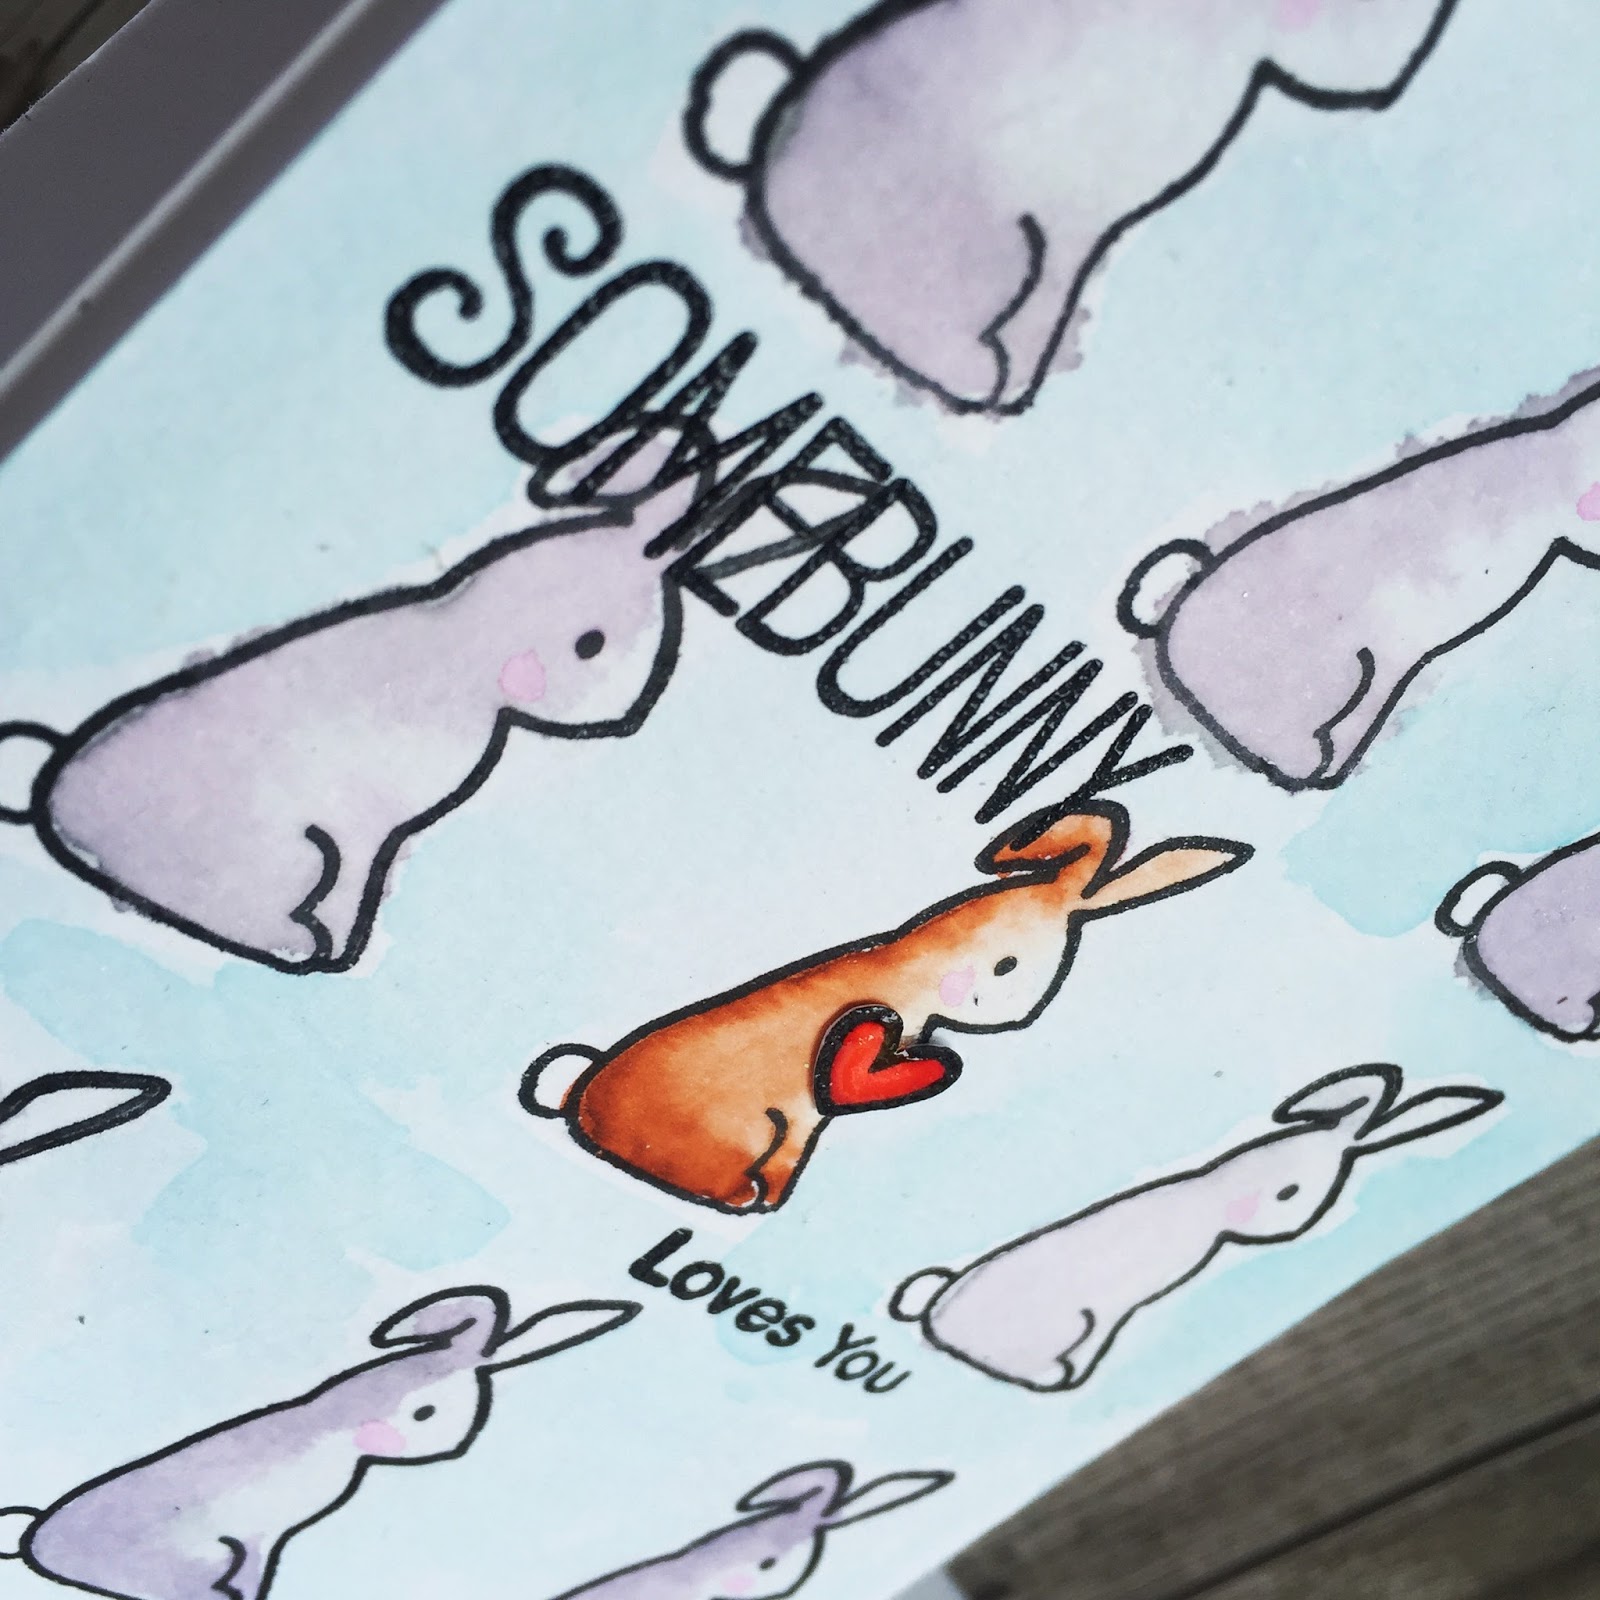
I enjoyed this design so much, I made another card in the exact same way, using Mama Elephant's New Family, and a sentiment from My Favourite Things Some Bunny, so thought I would quickly share that here too....


I really hope you like them.
As always, everything used is linked below.

See you next week.

Jillx

Monster Jam  New Family Stamp

Zig Clean Color Real Brush Pen (24 piece set)  Somebunny Image 1


Wednesday, 11 May 2016

Smooches and Rainbow Flowers...

Hi everybody,

I would like to share a couple of cards I have made for the current challenges going on over at the delightful Paper Smooches Blog - Rainbows, and the always awesome, Simon Says Stamp Wednesday Challenge blog - Flowers.  Rainbows and flowers, what a beautiful mental image that conjures...so why not bring the two together, I thought?

   Simon Wednesday Challenge Blog

And here's my cards...


I started with one card, but was enjoying the technique and design so much, I decided to make a matching set.


I had spotted a card on Instagram by Kymona Tracey, using a background paper by Fancy Pants Designs and oh my word...I just fell in love with it, and knew instantly I had to CASE it...but add my own twist.
I used Distress Inks to create my watercolour background, and made my splodges really wet to encourage the dripping.  I wanted it to stay really abstract, but kept in the back of my mind where I would want my flowers and leaves to be placed so I could add the right colours in the, kind of, right areas.  Once I was happy with my background, I left them to dry and got a start cutting several sets of Paper Smooches Roses die from black card.  Once cut, I added my roses to my background, placing my flowers and leaves around the areas of colours.  I then die-cut a couple of Paper Smooches word dies (Love & Thanks), and cut them both several times from white card.  My 'Love', I built-up and in-laid back in to the front, adding a white embossed piece of black card with 'sending' on it to complete my sentiment;  and my 'Thanks' I built-up, added a lick of Wink of Stella, a layer of vellum (completely pointless as you couldn't tell AT ALL once it was up against the white haha), and adhered it to the front of my card.


I added a few doodles with white and black gel pens, for a little added interest, mounted onto card bases, and there you have it.

I really hope you like it and would love to read your comments so please feel free to leave them.
Oh, and be sure to click the link to check out Kymona's card...sooo beautiful!

See you soon.

Jillx


Friday, 6 May 2016

Loving No Line Colouring

Hi everybody,

Jill here, and this week I am practising, and loving, my no-line watercolouring.


Using a ton of Mama Elephant goodies...that are in the 'Sale' section!


I posted a card the other week trying out no-line watercolouring, and thoroughly enjoyed letting loose and having a play, so thought I'd give it another go, and share my results.
I used Mama Elephant's Tandem Ride and Tandem Extras, (with matching dies) to create my card, and you can find all of them...in the SALE  section of the store!  Serious.  Mama Elephant at a 'special price'!  Get em' while you can I say!


I used my Gansai Tambi paints (of which the beautiful 'Starry Colours' selection is back in stock...for now!) as my watercolour medium.  I stamped out all my different elements onto watercolour card in a very pale ink, took a deep breath, and just went for it!


All my cute critters are from Mama Elephant's Tandem Ride and fussy-cut, and my balloons and speech bubbles are from Mama Elephant's Tandem Extras and cut using the matching dies.  Like I say...all of these products are in store at a special price so be sure to check them out whilst they're still there!
I created a watercolour wash background as a backdrop to my little scene, and cut a few layers of vellum using Mama Elephant's Landscape Trio dies to build up my clouds for my little pals to float amongst.  I stamped out my sentiment, also from the Tandem Extras set, onto the vellum, and heat embossed in silver powder.  I adhered my balloons to the cuties then adhered them to my background using foam adhesive, and added the speech bubbles as a little fun touch to finish the card off.
I trimmed all my edges, matted onto black car, and mounted onto a card base.
Now I had a whole load already going on the front of this card, so skipped any embellishments and left it there.


I really hope you like it, and I hope it encourages you to step outside of your comfort zone and give something you're not too good at a go...it's where all the fun stuff happens!

As always, everything I used is linked below.  See you next week.

Jillx

Tandem Ride Image 1Tandem Extras Image 1
Tandem Extras Creative Cut Image 1Landscape Trio Creative Cuts Image 1