Showing posts with label MFT Sketched Chevron Background. Show all posts

Friday, 19 January 2018

Fab-stract Watercolour Flowers

Hi everybody,

Jill here, and this week I've got some abstract (well, that's what I'm calling it) watercolour for you...


...using Fab Flowers from Lawn Fawn.


If you're a regular visitor to our delightful blog you'll know I used the same set last week.  I've decided this is my 'new thing', and a way of getting more use out of my crafty stash.  I'm, (and I'm sure I'm not alone), like a kid in a sweetshop with my crafty goodies - spoilt for choice and too excited to play with everything all at once, so I tend to use a set then put it away never to be seen again for a long long time.  Well no more I tell ya.  So my new 'thing' is - I must make at least two cards with a set before it goes back in it's pack!  So this is the second outing of this beaut in as many weeks.
I was aiming for a kind of really loose, abstract watercolour effect with this design and the way I accomplished that was to use Distress Ink so the colours would react with water (Zig Clean Colour Markers would also work a treat), and, once my stamp was covered in ink, to spritz it with water before stamping it onto my card.  I don't think I'll ever fall out of love with the look of watercolour, and this technique is by far one of the easiest ways to achieve it.  I stamped out all my elements using the same technique, die-cut, and then built up a sweet bouquet adhering each piece from the back.  My background is My Favourite Thing's Sketched Chevron (literally one of my all time favourite stamps let alone backgrounds) which I clear heat embossed and add a wash of blue inks over-top.


I cut Lawn Fawn's Love Ya Border Die to use as my sentiment and added another couple of elements from the Fab Flower's to tie my design together.
I finished by adding a purple twine bow and embellished with a scattering of clear gems, and there you have it.

I really hope you like it.
As always everything I used is linked below, and I'll see you next week.

Jillx


Fab Flowers  Love Ya Line Border Die  Sketched Chevron Background Image 1


Friday, 14 July 2017

Little Doggy Noisy Birthday Jam

Hi everybody,

Jill here, and this week, I've got a little doggy parade making a whole load of birthday noise...


...using Mama Elephant's, off the scale adorable, Little Dog Agenda.


Now it's no secret I am absolutely, unashamedly, unabashedly dog obsessed.  I'm that girl who will cross a road if it means a quick kiss off a puppy.  So when this set was released, my eyes were on beanstalks and I fell instantly in love!  I mean what's better than a dog?  Well I'll tell you what's better...twenty dogs!  Twenty cute, adorable, fun little puppies all packed on to one sheet of stamps!  Amazing.
So anytime I get a set like this I look through all the images and look for a story.  I try to find images that link together to help me create a scene in my head,  ...and I think it's pretty indicative of who I am that the loud noisy birthday band parade is what leapt out to me!


I started my card by stamping out my cute pooches (and the bottom half of my sentiment) onto my card panel and clear heat embossing.  I then added, freehand, some little sprigs of grass to ground my parade.  I wanted to create a sweet and simple scene for my card but I also knew I wanted to add a little extra interest by adding a background stamp to my, well, background (:/), so I masked off my images and sentiment then took My Favourite Things Sketched Chevron Background and stamped it across my panel, not taking too much care around the edges so it gently faded out.  I then set about colouring my images using Zig Real Brush Markers, (I apologise that I use these all the time but I am 100% hooked on them, they're just so easy to use and incredibly effective!).  Once my images were dry I moved on to colouring my background, again, using my Zigs, taking care to leave a space around my sentiment.  


I then finished up my sentiment, which is from Mama Elephant's Monster Jam and works perfect with my scene, by stamping the first line out onto black card and white heat embossing.  I also did this with the little 'Rock On' speech bubble from Mama Elephant's Rock and Paws and added both pieces to my scene using foam tape.
I finished by covering my scene and sentiment and adding a few flicks of ink across my background and there you have it.


I really hope you like it.  
As always everything I used is linked below so be sure to have a peek.

See you next week.

Jillx
Little Dog Agenda Sketched Chevron Background Image 1 Monster Jam

Zig Clean Color Real Brush Pen (12 piece set)Rock and Paws Small Cross Stitched Rectangle Lawn Cuts


Friday, 8 April 2016

Being negative, but feeling positive.

Hi everybody,

Jill here, and today, I'm being a little negative...


...but don't worry, it's all in the name of creating something pretty, by using the negative space from a die-cut!


I love a cool background and a statement sentiment to make up a card, so thought I would try this technique out to see if it was enough to stand on it's own.
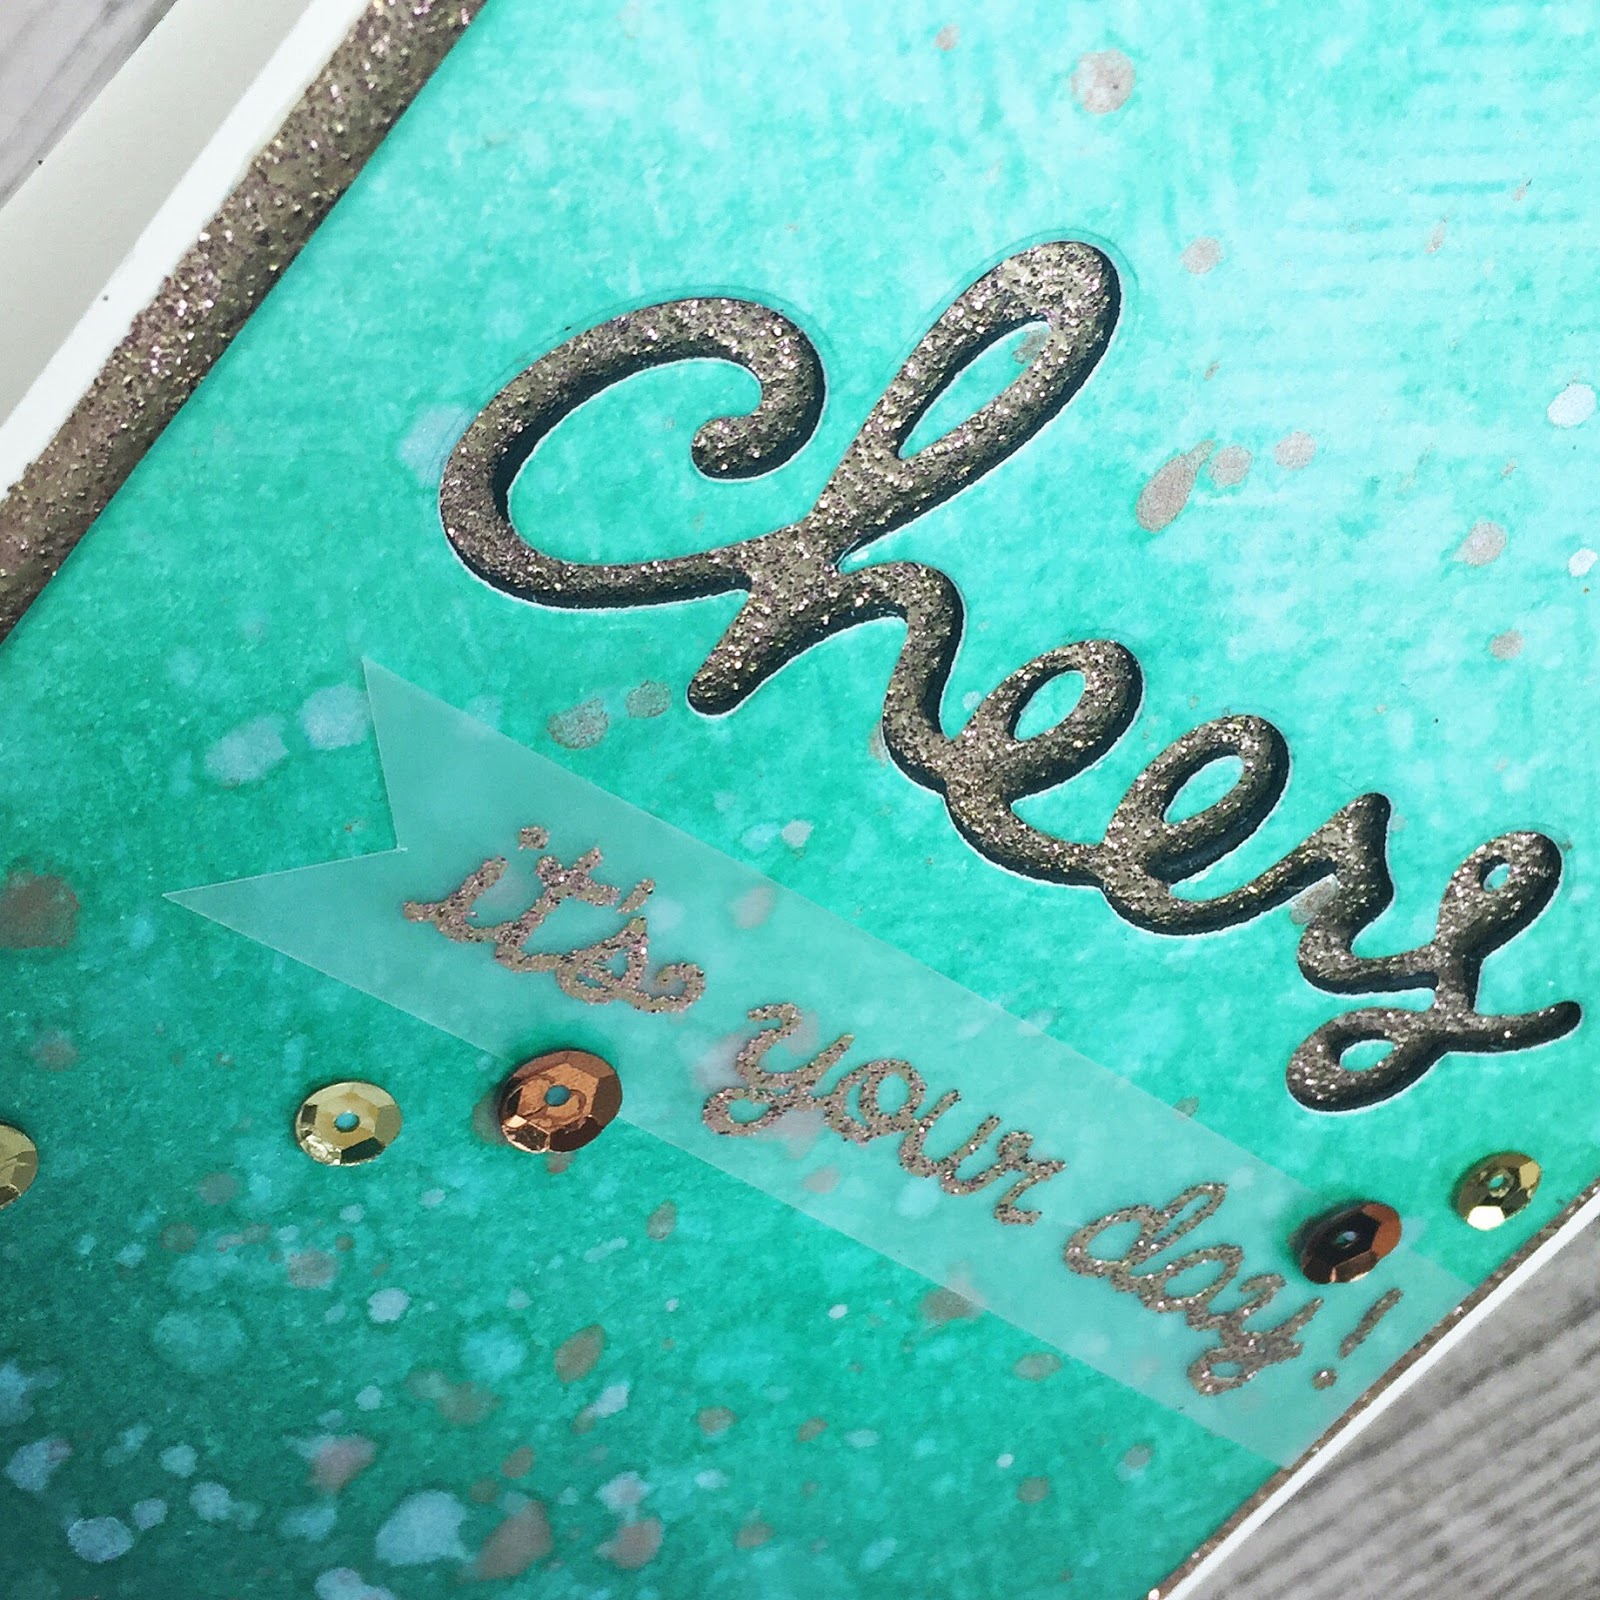
I started by creating my background.  I inked up a piece of card using various Distress Inks, going form dark to light green, creating an ombre effect.  I wanted a kind of teal/turquoise colour, of which there are not nearly enough of yet (Come on Tim!), so went over the whole piece in a light blue to create my own colour.  I then inked up My Favourite Things 'Sketched Chevron' background stamp, (still one of my favourite ever background stamps, it very rarely leaves my craft table.  It's just so subtle, and pretty, and versatile.  Love it!), in the same ombre of inks, gave a very light spritz of water, and stamped onto my card.  I then added a few sploshes and splashes of water, and of some pearl and copper mica powder sprays I had made up, to add extra interest.


I knew I was going to need even dimension across my whole piece of card, so that the less supported areas didn't droop and distort, so I adhered a piece of of black foam sheet across the back of my entire piece, making sure to hit every area with glue so even my teeny pieces would stay intact once cut.  I then took Lawn Fawn's 'Scripty Cheers' die, and cut it from the upper centre of my card.  Once cut, I made sure to keep the piece in the card using a piece of low-tack tape, so everything stayed exactly where it should be.  
I then took another piece of card, slightly bigger than my main panel, and heat embossed, pretty much the whole thing, (that powder just goes on and on doesn't it?!) in this kind of copper/rose gold colour, paying extra attention to the edges and the area which would peek through my die-cut space.  I then put glue all over the back of my main panel, apart from the actual die-cut itself, and adhered to my embossed card.  Once in place, I carefully removed my 'Scripty Cheers' die-cut, leaving the negative space, and the wee little pieces, in place.  


I built up my sentiment to say a little more by heat embossing another stamp from my stash, onto vellum in the same powder, cutting into a little flag, and adhering to my card using a scattering of sequins I used to embellish with.  I mounted my whole piece onto a cream card blank, and that was that.
I really like how this turned out and am going to go back through my stash and see what else would work well.  So don't just look at your dies as the piece that actually cuts, think how many awesome designs you can get from the space it leaves behind, and turn your negative, into a positive :)

I hope you like it.  As always, everything I used is linked below so be sure to go have a quick snoop around the store!

See you next week.

Jillx


Sketched Chevron Background  Scripty Cheers Lawn CutsCrystal Clear Sequins Image 1


Friday, 18 March 2016

Hello, new baby.

Hi everybody,

Jill here, and this week I've got some simple Spring watercolour...


...to welcome a new arrival to this world.


I used Mama Elephant's gorgeous 'New Family' set to make my card.  It is such a beautiful and sweet set, full of soft and gentle images.
I started with a piece of watercolour card and, using a mix of Picked Raspberry and Worn Lipstick Distress Ink, brushed some simple stripes across my card.  I wanted it to look really loose, relaxed and laid back so did it free hand, I wanted to embrace the imperfections.


I then stamped out all my New Family images and coloured them, again intentionally keeping them soft and not over-thought, using my Zig Clean Colour Brush Pens, then fussy cut.  I die-cut a small circle from my front panel, and created a little scalloped edge border using a die from my stash, to create a little aperture from which to build my scene.  I then took a separate piece of card and stamped out the amazing Sketched Chevrons background from MFT, heat embossed in white and washed over it in blue - I wanted a simple but pretty background for my scene.


My sentiment is from the same gorgeous New Family set, and is simply stamped in black and clear heat embossed.
I built up my sweet little scene behind my aperture, adhered the whole thing in place and added my main panel over the top using foam adhesive to give my aperture scene some dimension.  I then mounted the whole thing onto a piece of light grey card, added a scattering of clear sequins, and there you have it.

I really hope you like it.

As always, everything is linked below, and I shall see you all next week 

Jillxxx

New Family StampSketched Chevron Background

Thursday, 10 December 2015

Hogs and Kisses...

Hi everybody,

Jill here, and this week, I've got some cute piggy kisses for you...


Using the new awesome 'Hogs and Kisses' set from Avery Elle.


I, literally, fell in love with this set as soon as I saw it.  You get a pig, a cow, and a sheep, all holding hearts, with a choice of sentiments to pop in the middle of them - oh, and also two sweet little chickens.  Now I get that sounds a little weird, but they are just adorable - so if you haven't checked them out yet - you definately should!  In my world, weird is good!

So I started by stamping out my little piggy, twice, as I knew I wanted to build the heart up a layer, and coloured using Copics.  I then took a panel of card and die-cut it into sections using Lawn Fawn's Grassy Border, and the cloud from Mama Elephant's Landscape Trio, to build-up a little background scene.  I coloured the grass and the sky, again, using Copics.  I cut Lawn Fawn's Say Cheese die, and, using foam adhesive for dimension, added it around my little scene.


My background is the Sketched Chevron Background stamp from My Favourite Things, and is stamped outo white card using Hero Arts Soft Pool Shadow Ink.


I added a little banner of vellum which I had stamped the 'XO' from the Hogs and Kisses set onto, and added a couple of pink enamel hearts.  I added a twirl of Lawn Fawn's Pink Lemonade Twine behind my Polaroid scene, before adhering everthing in place, matting onto black card, and then onto a white card blank.

I really hope you like it, as always, everything is linked below.

See you next week.

Jillx

Hogs & Kisses         Grassy Border Die  Say Cheese DieSketched Chevron Background

Landscape Trio Creative Cuts   Soft Pool Shadow Ink   Pink Lemonade Single Twine