Friday, 6 May 2016

Loving No Line Colouring

Hi everybody,

Jill here, and this week I am practising, and loving, my no-line watercolouring.


Using a ton of Mama Elephant goodies...that are in the 'Sale' section!


I posted a card the other week trying out no-line watercolouring, and thoroughly enjoyed letting loose and having a play, so thought I'd give it another go, and share my results.
I used Mama Elephant's Tandem Ride and Tandem Extras, (with matching dies) to create my card, and you can find all of them...in the SALE  section of the store!  Serious.  Mama Elephant at a 'special price'!  Get em' while you can I say!


I used my Gansai Tambi paints (of which the beautiful 'Starry Colours' selection is back in stock...for now!) as my watercolour medium.  I stamped out all my different elements onto watercolour card in a very pale ink, took a deep breath, and just went for it!


All my cute critters are from Mama Elephant's Tandem Ride and fussy-cut, and my balloons and speech bubbles are from Mama Elephant's Tandem Extras and cut using the matching dies.  Like I say...all of these products are in store at a special price so be sure to check them out whilst they're still there!
I created a watercolour wash background as a backdrop to my little scene, and cut a few layers of vellum using Mama Elephant's Landscape Trio dies to build up my clouds for my little pals to float amongst.  I stamped out my sentiment, also from the Tandem Extras set, onto the vellum, and heat embossed in silver powder.  I adhered my balloons to the cuties then adhered them to my background using foam adhesive, and added the speech bubbles as a little fun touch to finish the card off.
I trimmed all my edges, matted onto black car, and mounted onto a card base.
Now I had a whole load already going on the front of this card, so skipped any embellishments and left it there.


I really hope you like it, and I hope it encourages you to step outside of your comfort zone and give something you're not too good at a go...it's where all the fun stuff happens!

As always, everything I used is linked below.  See you next week.

Jillx

Tandem Ride Image 1Tandem Extras Image 1
Tandem Extras Creative Cut Image 1Landscape Trio Creative Cuts Image 1


Friday, 29 April 2016

Going For Gold

Hi everybody,

Jill here, and this week, I am going ga-ga for gold!


Using the incredibly beautiful new Gansai Tambi Starry Colours Watercolour pan set.


And oh my goodness are they beautiful?  They are so shimmery and easy to use!


So me being me, the first thing I wanted to with them was, of course, a background wash.  I wanted to see how they would react with my Distress Inks and to see if the pretty shimmer would remain when mixed with another medium, and boy oh boy, it definitely did.
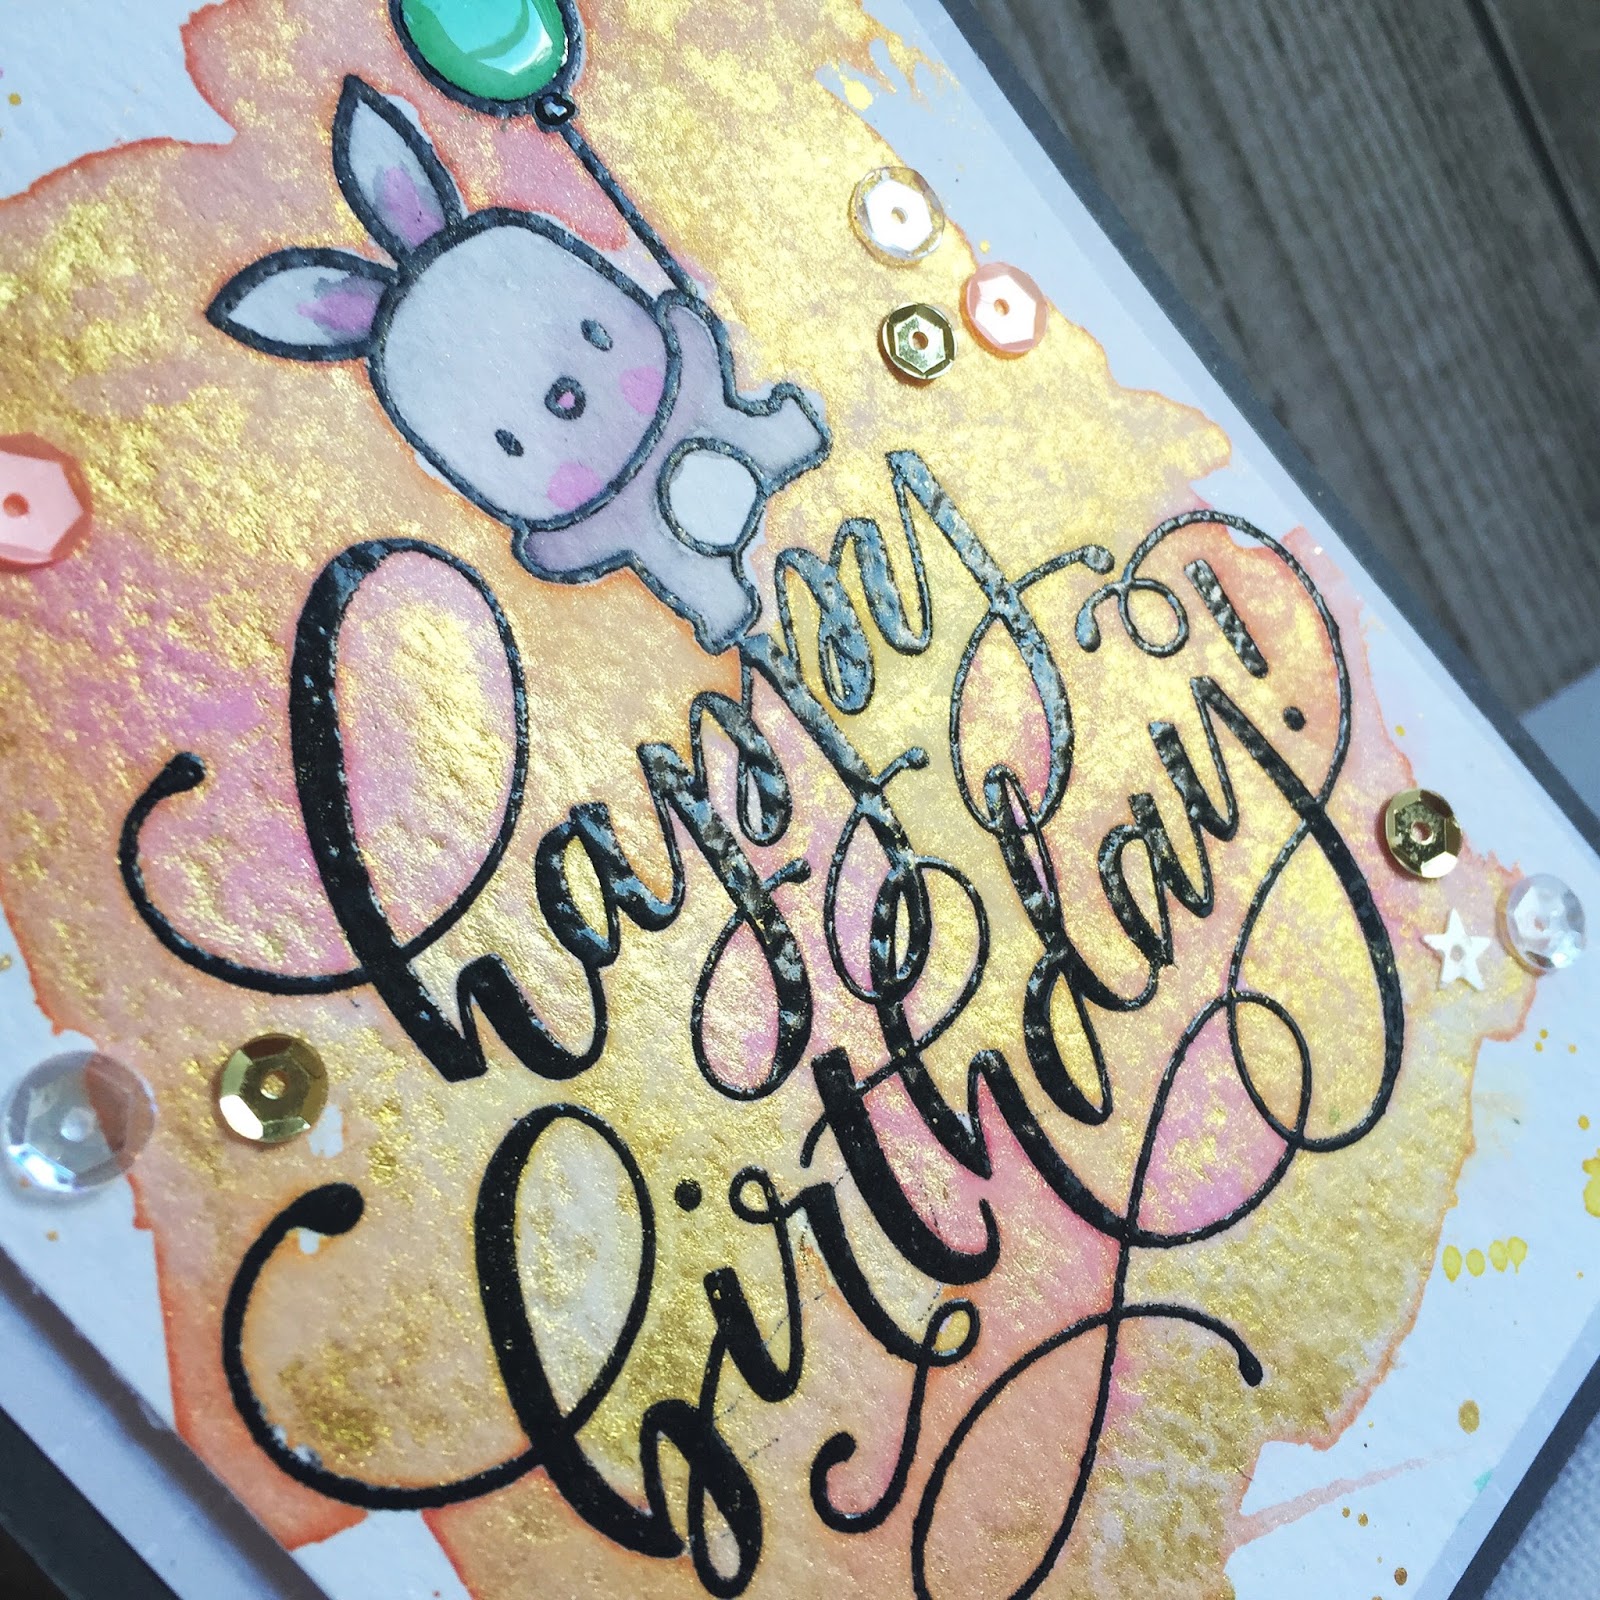
I started with a piece of watercolour card and stamped out this huge 'Happy Birthday' sentiment from Mama Elephant's Birthday Wishes set, in black Versafine, and clear heat embossed.  I then stamped out this cute little bunny from Mama Elephant's Lunar Animals, and the little balloon from Mama Elephant's Woodland Gifts, and again, clear heat embossed.  I then masked  off my little bunny with 'drawing gum', (if you haven't already got some - get some - it makes masking soooo much easier, especially with watercolour).  Then for the fun part...  So the Gansia Tambi Starry Colours set includes 6 different pans of different golds, all absolutely beautiful, and in varying degrees of intensity.  I had already tested out my colours on a piece of scrap card, and chose which golds I wanted to use.  I went for the more intense colours as I knew I wanted to us it along some Distress Inks, and wanted the gold to stand out.  I used them in exactly the same way I would any other watercolour, and just went in to create a wash over my sentiment, sploshing and swooshing the colours around wherever I saw fit.  I then introduced my Distress Ink, a variety of pinks as I thought the gold and pink would look so pretty, and again, swooshed them over by background, then set aside to dry.


I was not let down with the shimmer once dried, it is gorgeous, although blumming hard to photograph!  I removed the drawing gum from my bunny and balloon, and coloured them both using my Zig Clean Colour Real Brush Pens, another incredible product new to the store!
I matted my panel onto a piece of paper from My Favourite Things Off The Grid paper pad, (which I LOVE and am going to re-purchase so I NEVER run of of haha), mounted onto a dark grey card base, added a coat of Glossy accents to the balloon, a scattering of sequins to embellish, and there you have it.

I really hope you like it.  
As always, everything I have used is linked below, so be sure to take a look.

See you next week.

Jillx

Gansai Tambi Starry Colours Watercolour Pan Set (6) Zig Clean Color Real Brush Pen (24 piece set) Off The Grid Paper Pack

Birthday Wishes Image 1 Lunar Animals Image 1 Woodland Gifts Image 1


Friday, 22 April 2016

Felty fun!

Hi everybody,

Jill here, and this week, I'm playing with the newest addition to the store, by getting my fun on with some felt!


Tara has brought to us some gorgeous quality felt, in some beautiful shades, and it is just so much fun to play with!


One of my favourite techniques of all time is in-laid die-cutting, and I couldn't wait to see how it would look using felt, so thought I'd give it a blast.


I started by selecting the colours I wanted to work with, there's so many gorgeous shades to choose from, and at such an awesome price.  I wanted to test how well the felt cut intricate dies, with wee little fiddly bits, so opted for the Dainty Flowers die from Paper Smooches.  I cut the outline from grey, and opted for a bright teal and pink for my pretty flower petals, bright yellow for my flower centre, and a lush green for my leaves.  I didn't want to waste the tiniest scrap of my felt, so only cut tiny pieces over the small parts I needed.  I'm not gonna lie, it was a little fiddly, and took a little more patience than when using card and the pieces just pop out, but the texture and just the joy of using a different material made it well worth the little bit of extra time it took.


I used Stick-it on my most of my pieces as I thought it would help stabilise the material, but cut it without also and found the results pretty equal.  When cutting the felt, I made sure to run it back and forth through my machine a few times to flatten the fibres, and I definitely think that helps.
Once I had 'in-laid' all my gorgeous flowers back into my card panel, I cut Paper Smooches Awesome word die right across the front of my scene, exactly like I would with card, and cut the same die from black felt.  And here's where my daft head took over - I had added Stick-it to my piece of black felt, but accidentally cut the die from the wrong side, so the stick-it was on the front.  'Well I'm not wasting it', I thought, so in-laid it back in to my panel using a piece of clear tape across the back, and give it a gentle sprinkling of glitter to take advantage of the sticky front!


I used Mama Elephant's Index Card Creative Cuts to cut a grey mat, and used a piece of patterned paper from Lawn Fawn's Perfectly Plaid 6x6 pad as a back drop.  I added a couple of heart enamel dots to embellish, and there you have it!
It's a massive thumbs up from me for the felt, I absolutely love it!  So much fun to use, and so lovely to be able to add such fabulous texture to your card!
As always, everything I used is linked below so I hope you have time to pop along and take a look for yourself.

Thanks for stopping by, see you next week.

Jillx


Marvelous Monochromes Felt Pack  Princess Pinks Felt Pack  Tropical Teals Felt Pack  Yummy Yellows Felt Pack  Garden Greens Felt Pack
Dainty Flowers Dies Image 1Awesome Die

Perfectly Plaid 6x6 Paper Pad    Index Card Creative Cuts Image 1


Stick It - LARGE


Friday, 15 April 2016

No Line water-colouring with Mama Elephant...

Hi everybody,

Jill here, and this week, I'm attempting some no line water-colouring...


...using the oh-so-sweet 'Spring Garden' set from Mama Elephant.


Now I am well aware I ain't no Kristina Werner over here haha - but I had loads of fun doing it, and am going to have loads more fun practising, so I thought why not share my efforts and learning curve?


I used Distress Inks as my watercolour medium.  I stamped this gorgeous little gal and guy out from Spring Garden, in Antique Linen, so it was a really light line, then proceeded to watercolour.  I love the kind of whimsical look of watercolour, and thought it would work perfect with this set as there's a lot of open space to play around with.  I also love that because watercolour can look so calm and laid-back, it can be really forgiven when colouring, and even when it doesn't turn out 'quite' as you planned...it looks like you meant it that way...or so I hope!  Once my characters were dry, I fussy cut them and set aside while i got on with the rest of my card.
To create my background, I die-cut a mask using Lawn Fawn's Grassy Border, and also Mama Elephant's Landscape Trio Creative Cuts die.  I placed them over a piece of watercolour card and washed more Distress Ink over the top, creating my grass and sky.
I then die-cut Mama Elephant's Picket Fence and again, washed using Distress Ink.


I coloured a few of the cute little blooms from the same Spring Garden set, coloured and fussy-cut them to use to help build up my background.
I stamped out my sentiment, (which I LOVE and can see me using sooooo much.  I call everybody sunshine, and just love the cool fun look to it - an awesome addition to an awesome set!), directly onto my background, clear heat embossed, then coloured the hollows of the 'sunshine' to help make it pop.
I built up my background and adhered my characters in place using foam adhesive.  I mounted my panel, off-centre, onto a piece of slate grey card, then onto my card blank, and that was that.
Like I say, I love the simplicity of watercolour, so didn't want to add any embellishments.

I know I need a lot of practise, but the process is so relaxing, I really enjoyed making this; and I know it can be quite intimidating when you feel the skill-set is not 'quite' there, but so what, we're meant to be having fun, right?
I really hope you like it, and I really hope you give it a go.  Let's learn together :)

See you next time.

Jillx



Friday, 8 April 2016

Clean, and Sew Simple, die-cutting...


Hi everybody,

A quick post to share a card I have made for this month's challenge going on over at Neat and Tangled, Little Tangles challenge blog, where this time round, it's all about the 'Die-cutting'.


And here's my card...


I used Neat and Tangled's 'Hoop die' as the main element for my card, and kept my design very Clean and simple.


I started by cutting my Hoop from a piece of graph paper a couple of times, the second time leaving plenty of room in the surrounding area from where I cut a scalloped circle, as the kind of 'skirting' around my embroidery hoop.  I also cut the Hoop die form a piece of wood veneer, and the extra hinges & pin from a couple of pieces of card I had embossed in gold and silver sparkle powder.
I then die-cut a heart from the centre of my hoop, and heat embossed the positive piece in red embossing powder, then another layer of sparkle embossing powder, and in-laid back in.  I then stamped out my sentiment from Neat and Tangled's 'Crafting is my jam' in black ink and clear heat embossed.
I then took a panel of kraft card, and dry embossed it using a wood grain folder, and mounted all my elements upon it, off-centre, and snipping off the over-hang.


I wanted to keep my card completely CAS so, after mounting onto a white card base, left it there.  In hindsight, I really wish I'd added a twirl of twine beneath my hoop as I think it would have finished my card perfectly...but that's the thing with hindsight right?...it always comes a little late!

I really hope you like it and would love to read your comments so please feel free to leave them.

See you next time.

Jillx