Showing posts with label #simonsaysstamp. Show all posts

Friday, 8 August 2014

Simon Says Sparkle...

Hi there,

I'm going to share a card I made for the always awesome, Simon Says Stamp Wednesday Challenge, which this week is 'Make it Sparkle'.

Simon Wednesday Challenge Blog

Also this week, Simon Says Stamp, are showcasing the incredible, Neat and Tangled, who I LOVE, so a total double whammy of fun for me this week!


And here is my design...


Sparkle...you either love it, or you hate it...and I definitely fall into the 'love it' category!  I have no problem with being a little over the top, life's to short to shy away from glitter I say!!  

I started with my DCWV 'Twinkle stack' and chose my two feature colours, I went with a delicious full on sparkle silver, and a more subdued gun-metal.  I cut my gun-metal sheet with Lawn Fawn's 'journal card' die, and heat embossed Neat and Tangled's 'My favourite'  (one of my favourite stamps ever ever ever) in silver embossing powder on the front.  I used Cosmic Shimmer's 'Gunmetal' glitter paste over a Studio Calico 'Falling Star' mask to give added sparkle and texture to the background.  I added a few gorgeous shimmery ribbons as little flags and tabs, and kept it very simple (three layers of glitter is quite enough to have going on, even for me haha) by embellishing with a few little sparkly gems.  

And there you have it.

I really hope you like it and would love to read your comments.

Jillxxx


Wednesday, 6 August 2014

Family love...

Hi everyone,

Just want to share a card I have made for the Simon Says Stamp Monday Challenge, which this week is 'In The Family, and you can find all the details here...

Simon Monday Challenge Blog


Now, to me, family isn't defined by biology, it is defined by love, and here is my entry...


I decided to use some supplies I hadn't used in a loooooong time - my alcohol inks!!  So my background is a mix of Blue, Pool, Yellow and Gold alcohol inks, with a tag coloured to match in distress inks.  I then stamped both the background and tag using this lovely sentiment, which sums up my thoughts on family to perfection, using Sheena Douglas's 'Only word's, Through the rain' stamp set and over-laid them so the stamping would match up whilst giving dimension.  

I decorated the card using some vellum and an EK Success 'Doily' border punch, some twine and sequins.

I've gotta say, I really enjoyed making my background with the alcohol inks, and have been inspired to experiment a little further with them.

Thanks for stopping by, please feel free to leave a comment.

Jillxxx


Saturday, 19 July 2014

About a face...

Hi everyone,

A quick share of a card I made for the delightful Simon Says Stamp Monday blog challenge, which this week is 'About a face'.

It gave me the perfect excuse to use a stamp I have, from Indigo Blu, which hadn't been inked up yet (outrageous I know!)...and here is my finished project...


So, as you see, I really went to town on this card haha.  I started with a piece of vintage sheet music and watercolour washed it using distress inks (Vintage Photo, Tea Dye, Victorian Velvet, and Dried Marigold).  Then, using a Memory box stencil, I covered it in 'Grunge Paste' and set aside to dry.  In the meantime, I stamped my main 'face' image (from Indigo Blu) on a piece of torn card, grabbed a previously made Martha Stewart paper clay frame and various off-cuts of ribbon and twine, and gave them all the same watercolour wash.  My sentiment is from an Avery Elle set, and I stamped it in Plum Archival ink and distressed it using the same palette.  Once my background was dry, i covered in the same inks, and finished off with some gold gilding wax around the edges to highlight the design of the stencil.  I constructed my card in an intentional messy and haphazard way,  just to create some interest.  I then added a few vintage looking brown sequins and there you have it.

A change from my normal style, but I really enjoyed doing something different.

I hope you like it, I'd love to read your comments.

Jillxxx

Wednesday, 16 July 2014

Simon Says - Let's be clear! ...

Hi everyone,

Just want to share another card I made for the Simon Says Stamp Wednesday Challenge which this week is 'Lets be Clear'.

I decided I wanted to have a good play with my embossing pastes, and see what effects I could achieve when using them on acetate ( please see previous post for more samples).

And here's my entry...


I started with a top folding tent card, made from acetate, masked off and taped to my craft sheet.  I then used this gorgeous Memory Box 'Star' background stencil, and used a palette knife to cover in Dreamweaver white embossing paste, which is just the most amazing embossing paste, it's soft, creamy and a brilliant white, a pleasure to work with!

I cut the Lawn Fawn 'Speach bubble border die' from vellum and white heat embossed this gorgeous Mama Elephant sentiment from their awesome 'splendid' set.

I finished the card with a strip of striped silver glitter card from the DCWV glitter stack, and a few gorgeous sequins from doodlebug.  And there you have it....

Again, I was too wrapped up in creating to think about a space for a message, but when I send this out, I will add white card, die cut the same size as the speech bubble, and adhere this behind.


And here's another example of the same technique I thought I would share....


Such a fun technique with endless possibilities!

I really hope you like it.

Thanks for looking.

Jillxxx


Embossing paste on acetate...

Hi everyone,

Hope you are all well.  I am enjoying a well deserved and over-due day off so thought I would share a few cards I made for the Simon Say Stamp Wednesday challenge which this week is 'Let's be clear'.

Now I'm pretty sure I am not alone in being slightly obsessed with embossing paste at the moment, so thought I would have a play around and see what the effects are like when using on acetate.

And here's my result...


I started by creating my card blank from acetate and scored to create a top folding card.  I then taped my front to my craft mat and covered small polka dot mask in Cosmic Shimmer silver glitter embossing paste.  I LOVE this stuff, it comes in some incredible colours and is so easy to work with.  I then die cut a circle from vellum, (well, why not go the whole hog and go clear all the way), and heat embossed this gorgeous sentiment from Mama Elephant's 'Splendid' set - one of my all time favourite sets!  I then used my EK success circle scissor to create this thin silver circle frame to bring it all together and adhered to the card using small amounts of clear glue gel behind the frame.

I didn't have time, but when I send this card out, I will die cut a circle the same size as the vellum to pop on the back of the card for my message to go on.

I was really happy with the effect and instantly had to try the same thing with some of my other favourite masks (see other posts).  So another reason to love embossing paste!  These fellas just keep giving ey?

Well, I hope you like it, as always, I would love to read your comments.

See you next time.

Jillxxx

Sunday, 29 June 2014

Shake it with love...

Hi everyone,

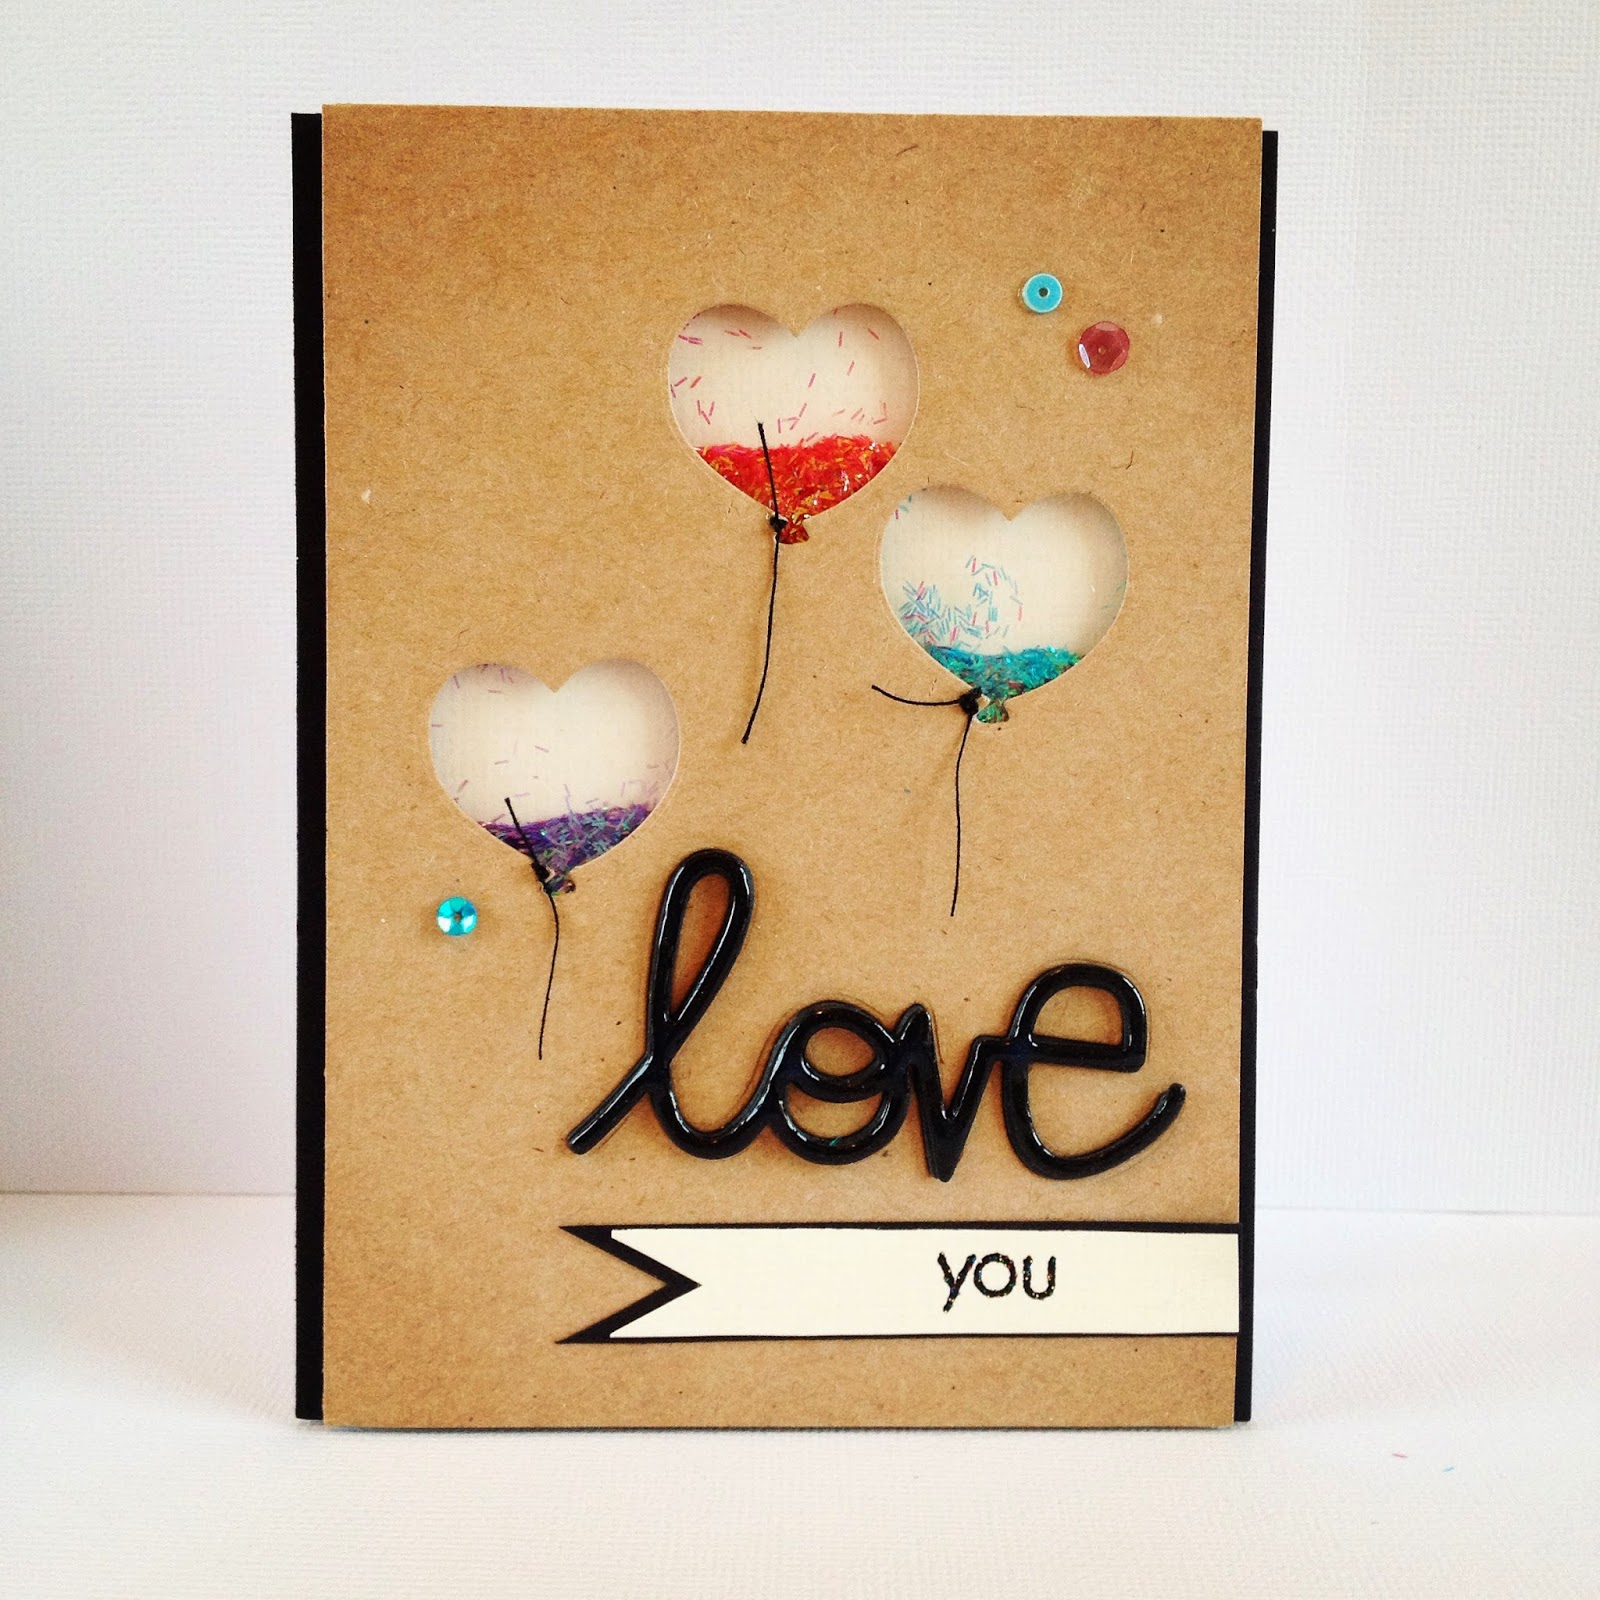
Just want to share a shaker card I made just for the fun of it;  and here it is...


I love a good shaker card, they're just so fun and tactile with so many possibilities...surely a shaker card can put a smile on anybodies face :)  

So,  I started with a piece of kraft card and die-cut these three adorable heart balloons from Paper Smooches 'balloon' set, and covered them, from the back, in acetate.  I then followed the shape of the balloons in shaker tape to create little self-contained compartments in which to pop my Martha Stewert 'Tinsel glitter'.  Once my little balloons were full of glitter, I then covered the whole thing with a piece of cream card. Then, to make the balloons stand out as actual balloons, I added little strings to them with black thread. I then die-cut 6 or 7 Paper Smooches 'love word' die-cuts and glued them together to create a more substantial sentiment, in-laid it into the card base, and covered in glossy accents.  I  made a small cream on black banner as a mat to stamp my 'you' onto, embellished with a few complimentary sequins and there you have it.  

I love how this card came out...and my favourite thing about it is that Simon Says Stamp 'liked' it on Instagram :) :) :) ...talk about a compliment...talk about making a girl happy!!!  I can't tell you how over the moon that made me :) :) :) 

As always,  I hope you like it and would love to read any comments you are kind enough to leave.

jillxxx

Monday, 23 June 2014

Simon says love your friends :)

Hi everyone,

A quick post to share a card I made for Simon Says Stamp Wednesday challenge, which this week is 'You gotta have friends', a lovely idea for a challenge to create something for a friend.

And here's what I came up with...


This is actually an acetate card that I planned on being clear, but I made a last minute change and decided to add that lovely pool glitter card on the back - I'll post pics of the card as I planned it also, and see which you prefer.

The stamp set I used is Avery Elle's 'Red & Goldie', which I LOVE!!!!  It is just so cute. I coloured my image using distress inks as watercolours and trimmed with a little black card and some yellow polka dot paper from the amazing Lawn Fawn 'Lets polka' pad.  

I finished the card with some cream twine and a small wood veneer heart which i coloured and clear heat embossed.

Here is the card before I added the pool glitter card, I'm still undecided which one I prefer as I do love an acatate card, but I do really like the contrast between the pool and the yellow.  Hmmm, what do you think?


I hope you like it, please feel free to leave a comment.

jill xxx