Friday, 11 November 2016

Clean colour cuteness to say 'Thank you, Amigo'!

Hi everybody,

Jill here, and this week, I've got a cute 'Thank You' card coloured with Zig Clean Colour Pens...


...using Mama Elephant's Three Amigo's and Sunday Sentiments.


I made this card for my best friend, and favourite amigo, to say a massive 'Thank you' for doing something extraordinarily kind for me.  I love how this crafty hobby means you can create something to say exactly what you want to, the absolute personal touch that hopefully let's the recipient know how truly special they are to you!
I melded two of the Sunday Sentiments together to make my sentiment just right.


I started by stamping out my cute little kitty form the Three Amigo's set, and masking off.  I then took the 'thank you' sentiment from Sunday Sentiments, only inking it to where the words finished, then took the 'hello friend' sentiment from the same set, and selectively inked that line up also to complete my sentiment.
I used masking fluid to mask off the bottom half of my panel and my wee amigo so I could get a really nice wet wash, using my Zig Clean Colour Pens, for my background without it bleeding where I didn't want it too.  I added a few flicks and splashes across my background before removing thew masking fluid.


I then coloured my kitty and beneath my sentiment line, and stamped my message onto my sign.
Once everything was dry, I embellished with a scattering of pretty sequins, matted onto a card blank, and left it there.


I really hope you like it, and just wanna say, Thank you so much Lynne...this one's for you :)

See you all next week.

Jillx

Three Amigos Image 1Sunday Sentiments Image 1Zig Clean Color Real Brush Pen (24 piece set)


Friday, 4 November 2016

Enjoying the ride in a dreamy sky.

Hi everybody

Jill here, and this week, I'm floating off into a dreamy sky...


...with he help of WPlus9's Going Places.


This set is still one of my absolute faves, it is just so adorable.  The only problem with it is trying to choose which of the cute critters to use!


I started by stamping out the clouds across my background and heat embossing in white.  I then washed some pretty blue, pink, & orange Distress Inks across the back, using the heat embossing as a resist, and left to dry.  Once dry, i went back over my clouds with a waterbrush, dabbing up the ink to lift the colour, leaving my clouds much lighter.  I then stamped out my hot air balloon and and bunny, and watercoloured.  This is one of the few sets I have the matching dies for as i felt the were 'must haves'.  They not only cut the inner part of the balloon out, they also the snip around the critters little arms so they can be holding on to the side of the basket. gaaaaah! I mean, how cute is that?!


My sentiment is from the same set, stamped onto a piece of vellum, embossed in clear powder, cut out using the wee banner from Lawn Fawn's Stitched Journaling Card die, then adhered to the back of my balloon so the glue wouldn't show through.
I popped my balloon and little bunny in place using foam adhesive to add some dimension, added a scattering of pretty sequins, and there you have it, a sweet and simple dreamy scene.

I really hope you like it.  As always, everything I have used is linked below.

See you next week.

Jillx

Going Places Image 1Going Places Die Image 1Stitched Journaling Card Image 1

Friday, 28 October 2016

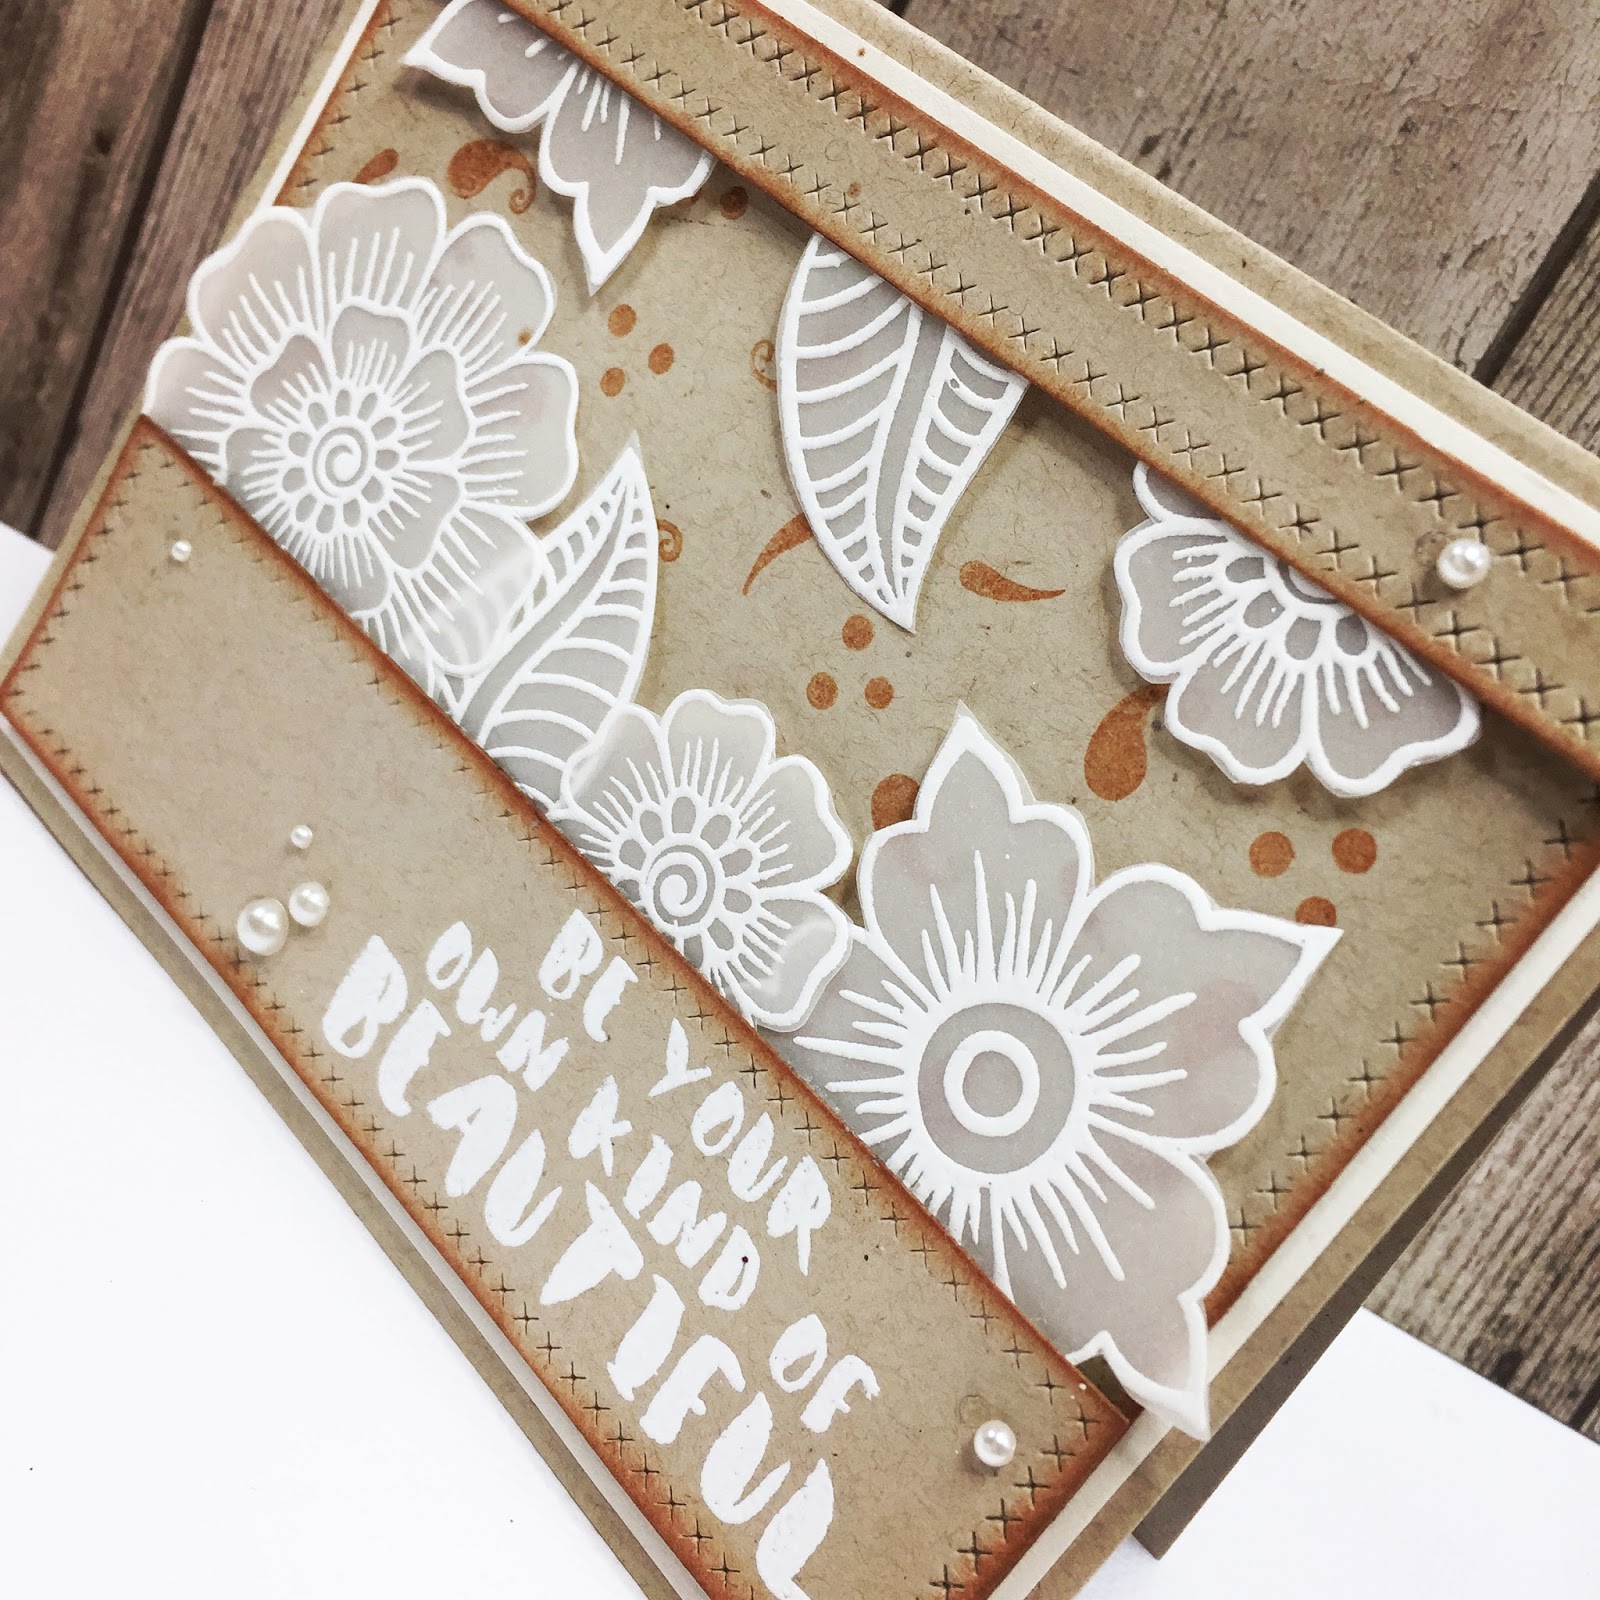
Bold but pretty, Vellum Hennah Elements

Hi everybody,

Jill here, and this week, I've got some vellum florals for you...


...using Altenew's Hennah elements.


Hennah Elements was my first ever Altenew set, and I still absolutely love it.  It's so bold whilst still being pretty, and has so much open space; great for practising different colouring techniques.
I decided to go along the pretty route this week, and what's prettier then vellum?


I started by stamping out my floral elements in Versamark ink onto vellum, and heat embossing with white powder.  I've never had a problem heat embossing on vellum, I think you just have to be quick and purposeful!  I then fussy-cut them all out and set them aside.
I cut two panels from kraft card using Lawn Fawn's Stitched Rectangles.  I covered the back piece in some of the smaller elements from the set, stamped out in a brown ink to create a gentle tone on tone effect, cut my front panel into two pieces, again using the Stitched Rectangles (You can create all different size squares and rectangles with a little careful lining up of the larger rectangles!), and inked all the edges.  
I stamped out my sentiment, which is from Altenew's Painted Inspiration, onto the bottom panel and, again, heat embossed in white.


I then lay-out my floral elements how I wanted them to look, peaking from behind my panels and, once I was happy, adhered them down.  I then added foam tape between my panels, and set everything in place.
I finished with a scattering of pearls, matted my piece onto cream card, and mounted the whole thing to a kraft card panel.


I really hope you like it, and as always, everything I have used is linked below.

See you next week.

Jillx


Hennah Elements Image 1Painted InspirationSmall Stitched Rectangle Lawn Cuts Image 1


Friday, 21 October 2016

Cute Critter Christmas Tags

Hi everybody,

Jill here, and this week I've got some cute critter Christmas tags for you...


Using Mama Elephant's adorable 'Page Huggers' set.


I didn't buy this set when it was first released as I was trying to be 'good', but then I remembered that good doesn't suit me and life's too short to not have adorable stamps, so snapped them up as soon as they were back in stock!  This set is designed to make little book marks, but obviously they are so cute and versatile, you can do anything you want with them.  As soon as I set eyes on them I knew I wanted to make tags from them, they have such a large simple body area I just thought they'd be perfect.


I started by stamping out my little Santa hats (how do you make something 'Christmassy?  Simple, whack a Santa hat on it!), four times onto strips of kraft card, masked off, and stamped by lovely huggers over the top.  I then coloured them, very simply, in coloured pencils.  I love pencils on kraft, and always think it works perfect with a festive theme.  I then scored a line, right above the highest point, folded my card strip, and cut around ensuring to leave enough connected area to make the tags strong enough.  I guess this would be much easier to do if you opted for partial die-cutting the matching dies, but I don't have them so went the old-fashioned route.  I then punched a hole through the top of each tag, and threaded with some red twine.  At this point they were done, and looking very cute, but I decided for one last final touch, to add a little candy cane to each of them; so stamped out, coloured and fussy cut these little canes from Mama Elephant's Reindeer Games, snipped a little cut around my critters paws, and added the cane.


I really love how these turned out, and really enjoyed making a project with a bit of a difference.

I really hope you like them, as always everything I have used is linked below.

See you next week.

Jillx

Page Huggers     Reindeer Games Image 1

Friday, 14 October 2016

Jump for you it's Autumn!

Hi everybody,

Jill here, and this week, I've got a really simple card celebrating the arrival of Autumn!


Using Lawn Fawn's incredibly cute 'Jump For Joy'.


I wanted to go with a really simple colour palette on my card, concentrating on some lovely autumnal tones, and  stamping and colouring my cute little critters in grey to replicate a more neutral no-line colouring effect.


I started by cutting a circle out of a piece of masking paper, and using both the negative and positive pieces to create my ink blended background.  I then added a little more interest by adding flicks and splashes of water and white ink across the background, and second generation stamping some of the block leaves that also come in the set, onto my panel.
I stamped out my main elements in co-ordinating colours to what I wanted to use, and coloured using Distress Inks as watercolours.  I then fussy cut all my pieces and began to put my little scene together using foam adhesive for dimension.


I stamped my sentiment straight onto my card panel and mounted onto a dark grey card base.


I added a few sequins to embellish, and there you have it.

I really hope you like it, and as always, everything I have used is linked below.
See you next week.

Jillx

Jump For JoySmall Stitched 4 Bar Rectangle Lawn CutsCement Grey


Friday, 7 October 2016

Frame your phrase with flowers.

Hi everybody,

Jill here, and this week I'm framing some loving words with some lovely flowers...


Using Avery Elle's gorgeous Peonies and Altenew's Painted Inspiration.


I started by cutting a panel using Lawn Fawn's Stitched Rectangles from watercolour card, and masking the edges off with low-tack tape.  I then stamped a selection of the small and large flowers and leaves from Avery Elle's Peonies, around the edges, heat embossing in gold as I went.


I then coloured my flower frame using Zig Clean Colour Real Brush Pens with water, and adding a few flicks and splatters across my background.
My sentiment is from Altenew's Painted Inspiration and heat embossed in gold.
I mounted my whole panel onto a Silver Fox notecard from Avery Elle with foam tape, and left it there.


I really hope you like it and, as always, everything I used is linked below.

See you next week.

Jillx

Peonies Image 1Painted InspirationZig Clean Color Real Brush Pen (24 piece set)

Silver Fox Notecards (12 pack)Small Stitched Rectangle Lawn Cuts Image 1