Friday 26 September 2014

Avery and Simon love...

Hi everyone,

I'm back with a card I have made for a couple of challenges...

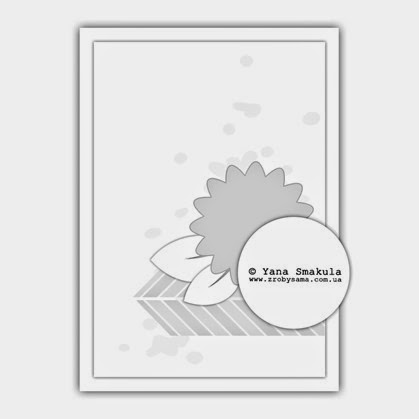
The Challenge going on over the awesome Avery Elle Challenge blog, which this time around is a sketch...and you can find all the deets here...


Challenge 16


Sketch-yana-smakula-7

And also for Simon Says Stamp's awesome  Monday Challenge, which this week is 'Stencils and Stamps', and you can find all the deets here...

Simon Monday Challenge Blog


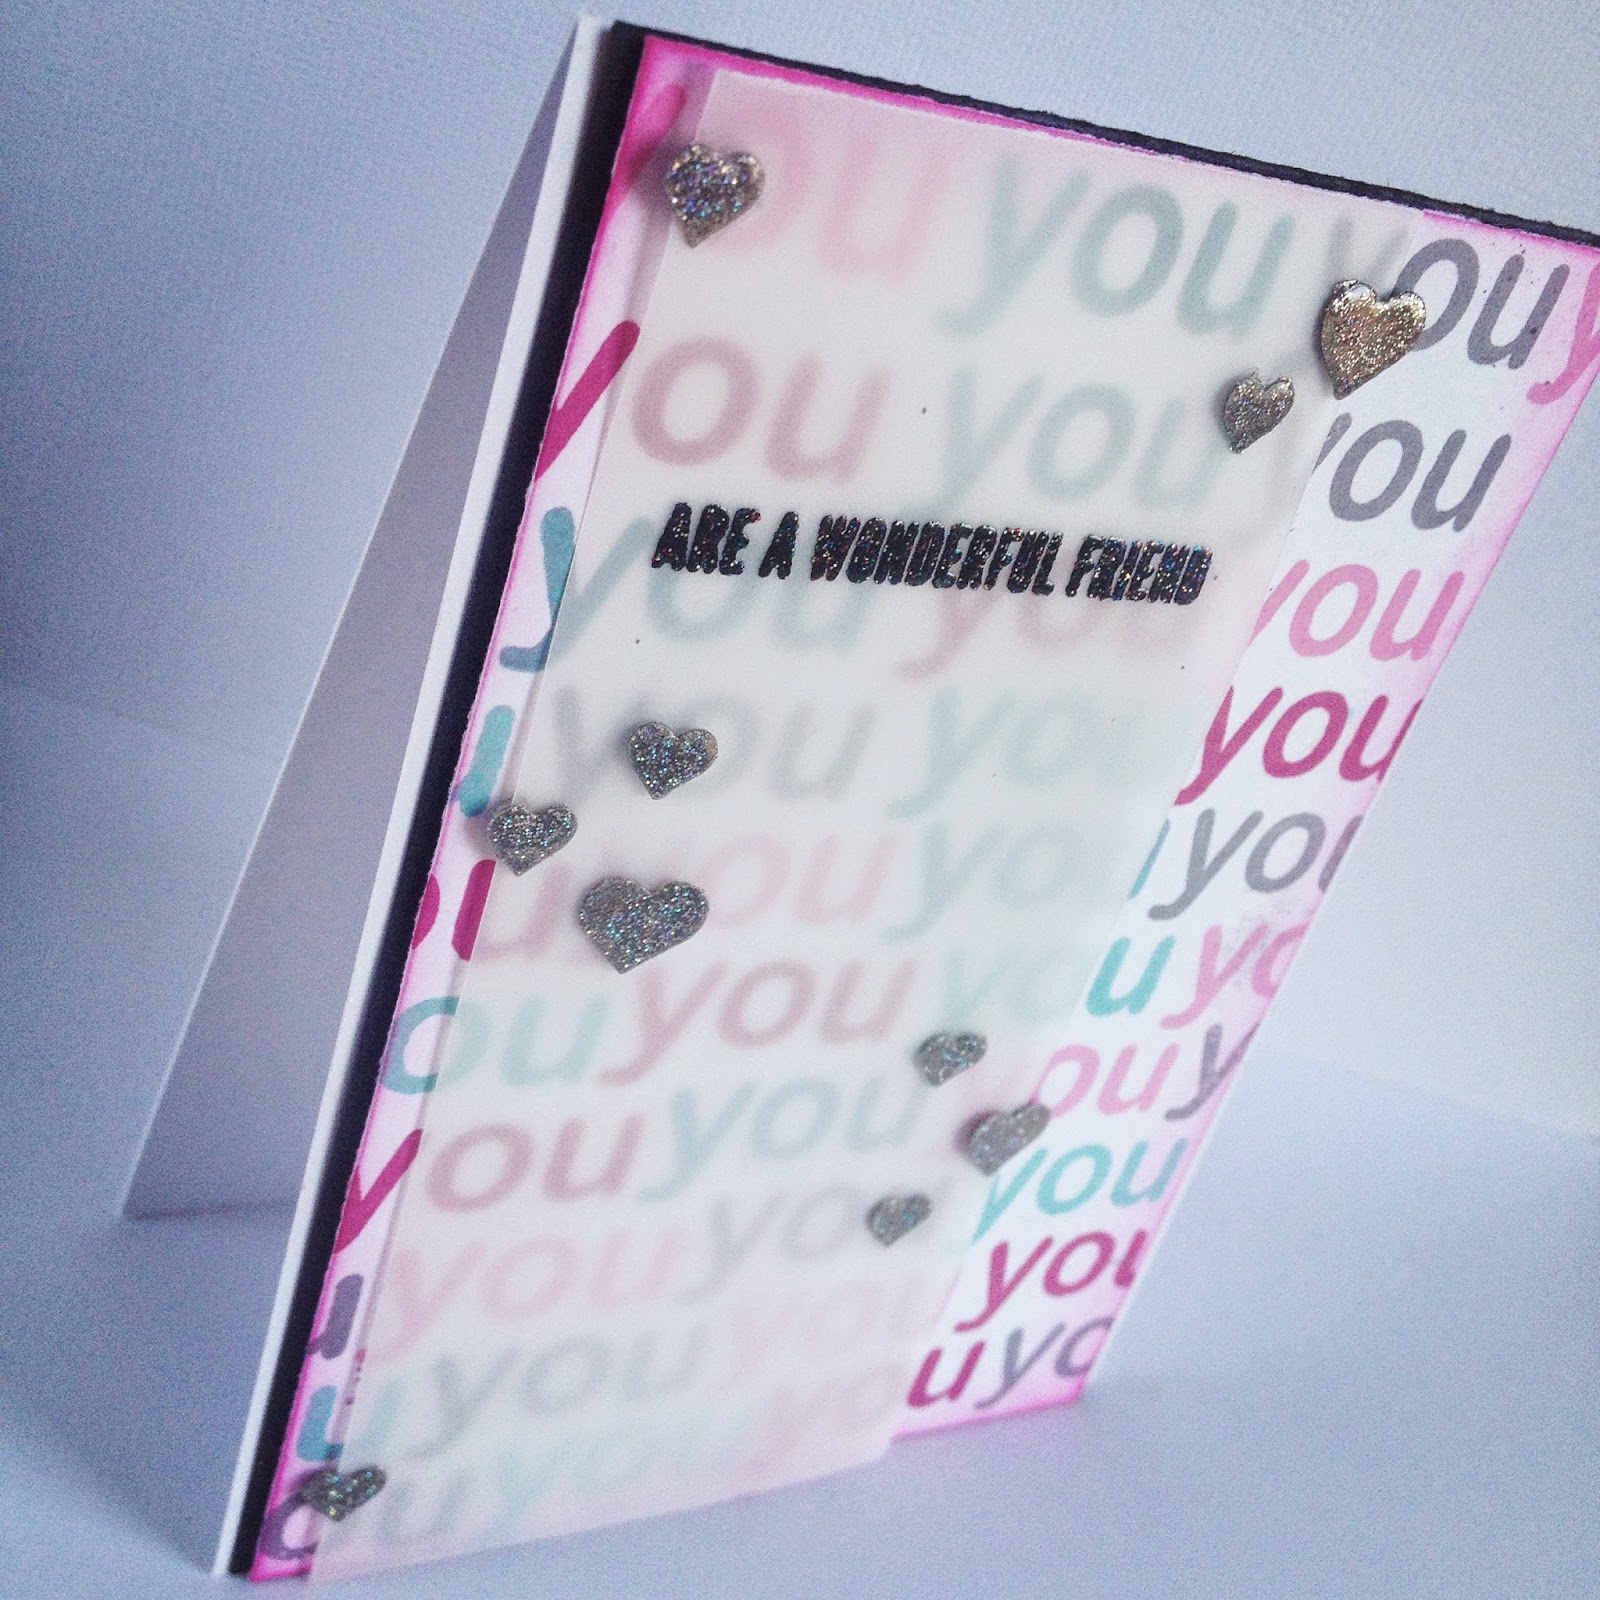
And here's what I came up with...


A Christmas card in September???!!! *facepalm*  Now I'm not gonna lie, I'm not the biggest Christmas fan in all the world, and this is my first festive dalliance of the year.  In fact it's fair to say I'm a wee bit of a grinch (sorry), ...but... I think this new 'Noel' stamp set from Avery Elle, could change all that!!!  I fell in love the second I set eyes on it and plan on doing a load of this years Christmas cards with it...so I'm already more excited than I would normally be LOL. 

I started with two different stencils, one thick chevrons from 'That Special Touch', and one with thin chevrons from 'Basic Grey', and used them both to create this background by over-lapping and inking through them with Tumbled glass, Chipped Sapphire, and Shaded Lilac Distress Inks.  I then took the largest snowflake from the 'Noel' set, stamped it out using Versamark ink, and heat embossed in silver.  I then stamped out my little doves of peace (awww, I LOVE this set) on a separate sheet of card, again, using Versamark ink, heat embossed in silver, and coloured them using a lilac mica powder mixed with water to create a paint.  While they were drying, I stamped out my 'Noel' sentiment from, yup, you guessed it, the 'Noel' set, onto vellum, in Versmark, and this time, I used mica powders brushed over the top to create a lovely lustrey (erm, clearly not a word, Jill), shimmery look - then over stamped and heat embossed with a clear sparkle powder.  I inked the edges of my card in Tumbled Glass Distress ink, and adhered my pieces to my card front, bringing my design together.  I embellished with a few matching sequins to pull all my colours in, and mounted onto some yummy mint striped paper from Lawn Fawn.  I finished by adding a few 'flicks' to my background using my mica paint I mixed earlier, and there you have it.

I'm pretty pleased with this card, and I'm even more pleased that I have an awesome set to make this years cards with :)  

I hope you like it, as always, please feel free to tell me your thoughts.

See you next time.

Jillxxx

Friday 19 September 2014

Blow out the candles & make a wish...

Hi there,

A quick post, (it's nearly bedtime), to share another card I have made for this weeks A blog Named Hero Challenge, 'Papers, Please'.

A Blog Named Hero

And here's my card...


Now I'll be honest, I'm a bit of a patterned paper hoarder.  I love and adore them with all my heart...but to look at, and touch, and love...not to actually use...never to *gulp* use!!!  And the pad I chose to use for this challenge...well, it very well might be my all time favourite, it is Basic Grey's 'Grand Bazaar' and my oh my...IT IS SO COOL!!!  It just oozes retro hip, and I LOVE it...I almost can't believe I used it...but what better time could there ever be?  Hero Arts and Basic Grey?!...enough said.  So I chose which papers I wanted to use, and said my final farewells to them, lol.  I also chose to use my Hero Arts, 'Big Candles' set.  I stamped the candles out onto my chosen patterned paper in black Archival Ink, clear heat embossed, and fussy cut them.  I then took the 'Make a Wish sentiment from Hero Arts', 'It's Your Day' set, repeatedly stamped it down the right hand side to create a column, and heat embossed in a sparkly golden powder.  I arranged my candles onto my panel, and adhered them using foam adhesive to give some dimension.  I then chose another couple sheets of paper (*be brave Jill, be brave*) to edge my panel with, and mounted the whole thing to my card base.  And there you have it.  I thought the patterns and the stamping were bold enough without any need for embellishments.

I really like how this came out, simple but bold
I hope you agree, I would love to read what you think so please feel free to leave any comments.

See yo next time.

Jillxxx

Cascading paper leaves...

Hi there,

I want to share a card I have made for the challenge going on over at A blog Named Hero, which this time round, is 'Papers, Please', and you can find all the deets here...

A Blog Named Hero

I make cards, and am obsessed with all things crafty...so it goes without saying that I LOVE HERO ARTS!!!  Don't we all?  They are like, the ultimate, right?

And here's my card...


My best friend said to me the other day, "we went to sleep, and when we woke up, it was Autumn!", and she was soooo right, it has just crept up on us and, all of a sudden, the leaves are falling from the trees!  So that's what inspired this card.  I chose Cosmo Cricket's, 'Earth Love' paper pad as I thought it just 'fit' perfect.  I chose my favourite papers from the pad, and stamped out a ton of different leaves from Hero Arts', 'Real Leaves' set, clear heat embossing them as I went.  I then fussy cut all of my leaves, and inked them up using Vintage Photo Distress Ink.  When I had enough, I layered them up until I was happy with how they looked, then glued them down at the bases, making sure to leave the upper parts of the leaves free to manipulate.  I then cut my card front aperture with a craft knife, leaving a 1/2" border the whole way round, and adhered it over the top, pulling the odd leaf out here and there to create this kind of 'cascading' effect.  My sentiment is from Hero Arts, 'Freinds' set, and is stamped in Archival Sepia onto vellum, and cut out using a Spellnbinders die.  I thought my 'cascading leaves' were pretty busy on their own, so embellished with a simple twine bow with a teeny little pearl in the middle, and there you have it.

I hope you like it, please let me know your thoughts.

Jillxxx

Thursday 18 September 2014

Mama Elephant and me...

Hi there,

I just want to share another card I have made for the September Challenge going on over at Mama Elephant, which, this time round, is Paper Piecing and Thank you cards...


And here's my card...


I knew I wanted to go with a vintage, nostalgic feel, so chose Cosmo Cricket's 'Eath Love' paper pad to do my paper piecing with.  It's just gorgeous and all hazy, and laid-back, and cool.  I took a few of my favourite papers and cut them into 1/2 inch strips (a bold and brave move for a girl who prefers to just look at and touch her papers, rather than actually use them!), inked the edges in 'Vintage photo' Distress Ink, and pieced back together on another piece of cardstock using wet glue.  Once dried, I die-cut a circle out of the middle to create an aperture for where my image was going to go, and added another couple of papers in decreasing circles to create a border.  I then moved on to my favourite part...this cuuuute little sweetheart from Mama Elephant's 'In my heart' set.  I stamped her out onto white cardstock, and watercoloured her using distress inks.  I then took the circle I had cut out, and stamped her out again on it, using this piece to, well, piece her...so her little dress would match, and line up with, the card front.  Now when I'm paper piecing, I never know how far is too far - and I think me doing her teeny tiny collar seperate may have been a little 'extreme', but hey ho, 'go teeny tiny or go home' as they say :/ lol.  I then inked up around my image to match with the rest of my card.  My sentiment is from Clearly besotted 'Time to celebrate' set, and is stamped onto watercolour card, using Archival  'Sepia', and then washed in 'Vintage Photo' Distress Ink, and again, edged using the same colour, then the whole thing mounted onto a piece of matching paper from the same pad.

I am really happy with how this came out, so hope you like it too.  Please feel free to let me know your thoughts!

Thanks for your time.

Jillxxx

Simon Says...so I do...

Hi everyone,

I'm sharing another card I have made for this weeks Simon Says Stamp Monday Challenge, which, this time round, is, 'Rock the Techniques'...

Simon Monday Challenge Blog

I have just discovered this ridiculously amazing product called 'Brusho', and just cannot get enough of it, so thought  I would use my new found 'techniques' with that to fit the challenge theme.

And here's my card...


I really can't say how brilliant 'Brusho' is, it's these little pots of intense 'colour crystals'. that when come into contact with water, just explode with vibrant colour!  I can't believe I have only just found them.  I love making water colour backgrounds, and these are just beyond perfect for that.  And that's how I started this card.  I sprinkled a few granules (you use the teeniest amount) of my chosen colours (turquoise, yellow, orange, and scarlet) onto some watercolour card, and spritzed with water.  I hope you'll agree, the effect is just tremendous!  Once my background was dry, I thought it looked like a cool galaxy, so straight away reached for this awesome new stamp set from Wplus9, 'Lucky Stars'.  I stamped out this superb sentiment in Versamark Ink and heat embossed using Ranger's 'Black Sparkle' powder.  I also stamped out a few of the stars from the same set and heat embossed also.  I added a few little silver pearl clusters using my Viva Decor 'Pearl pen' just to enhance the 'space' vibe...and that was that as I really didn't feel the card needed anything else.

So it's fair to say I am obsessed with Brusho already!  I just can't wait to learn more about it and, the fun part - practise, practise, practise :)

Thanks for stopping by.

Jillxxx


Wednesday 17 September 2014

Make the Day Special sketch...and some lawnscaping love :) ...

Hi there,

OK, OK, OK...so we all know I am a bit of a stalker when it comes to all things Make the Day Special,  I can't help it, pretty much my whole collection comes from their store haha.  I love playing along with their challenges...but even I can see that I'm getting a little creepy now (this is my third entry this month :/) haha, so this will be my last entry for September's  'sketch' challenge.   So, for the last time this month, here are the details...


And here's my card...


I'm not sure how far the 'artistic license' stretches on this sketch but, for my sake, let's just say 'free reign' :)!

I started by creating my two panels out of Lawn Fawn's 'Into the Woods' paper pad, and this gooooorgeous wood veneer panel Make the Day Special also sell.  I then made my 'shape' from die-cutting these little hearts using Simon Says Stamps 'Tic Tac Toe Hearts' die, and in-laid the hearts in green cardstock - creating a little meadow for my bunnies to graze in.  Which leads me on perfectly to the bunnies...they are from Lawn Fawn's brand new set 'Snow Day' and I have coloured them using my newest purchase, Spectrum Noir colouring pencils (I'm not really a Crafter's Companion kinda gal - but i NEEEDED these in my life and I'm really happy with them so far, although I need A LOT of practise).  I then cut Lawn Fawn's 'Grassy Border' die out of vellum, adhered this to the card, and added a little wrap of green twine to add to the whole 'meadow' vibe (remember that artistic license we were talking about...yeah, that...), and popped my little bunnies on top.  My sentiment is Mama Elephant's 'Everyday sentiments', and I stamped and heat embossed directly onto my background.  I embellished with a wee little twine bow, and that was that.

I really hope you like it, as always, I would love to read your comments.

Jillxxx

Edit:  OH MY WORDDDD!!! How have I missed this??!!!  So I am pretty obsessed with all things lawnfawn, and have searched for a challenge group for them, to no avail, for aaaaages...and have just stumbled across it by stalking other blogs!!!  Say whaaaa....whe...eh???!!!  Well, at least I got there in the end I guess.  So I am going to enter this into their current challenge, which is 'Critters galore', and you can find all the deets here...

Lawnscaping Challenge

Wish me luck xxx


Paper peicing with Mama & Simon...


Hi everyone,

Today I'm sharing a card I have made for the challenges going on over at Mama Elephant, (which is 'Paper piecing & Thank you cards)', and Simon Says Stamp, (which is 'Rock the Techniques').

          Simon Monday Challenge Blog


So my technique for Simon, is obviously my paper piecing for Mama, (...you with me?!), and also a technique using a new product to me...

And here is my card...


So the new product I have just discovered, and I can't believe I haven't heard of it before...BRUSHO COLOUR CRYSTALS!!!  Oh my word, I have no doubt these are not a well kept secret, and that I am just late to the bus stop...but oh my...they are AMAZING!!!  Like magic!  They are these teeny tiny granules (about the same grain size as embossing powder), and you just shake a few (imagine like the naughty embossing powder that sticks where you don't want it too - that amount), add water to them, and they explode with colour?  Ker-aaaazy I tell you!  So i started with them bad boys to see where it would take me...


Unbelievable, right?  My background reminded me of a beautiful summers day with the sun bleaching down from the heavens...so decided straight away I wanted to use my Mama Elephant, 'Love from Above' set, and to paper piece one of the cuuuute little cherubs, peering down from his cloud.  I used Lawn Fawn's 'Into the Woods' paper pad to paper piece with, to match the vibrant colours of my background, and coloured the lovely little fella with my other new favourite purchase, my Spectrum Noir colouring pencils.  My sentiment is from Hero Arts, and I thought it could fit with the stamp and the challenge theme, as in 'Thanks for being a star'...does that even make sense haha?  So I stamped it out on vellum, cut into a little banner and heat embossed it in Ranger's 'Black Sparkle'.  I then added a little ribbon banner, and some heat embossed stars (cut from Mama Elephant's 'Confetti' die), to embellish and balance out my card.   I then added a little 'thanks' sentiment to make the message a little less cryptic haha,

And there you have it.  I hope you like it and would love to read your comments.

Jillxxx 

Simon Says 'Make Your Own Background' ...#Take2 ...

Hi there,

I'm back again (very quickly as I'm panicking about making sure I have plenty time to link-up eeeeeeeeeek).

I am sharing another card I have made for the superb Simon Says Stamp Wednesday Challenge, which this week is 'Make Your Own Background'.

Simon Wednesday Challenge Blog

And here's my card...


I started with a piece of plain white cardstock and repeatedly stamped this 'you' stamp from Simon Says Stamps 'Expressions for you' set, in various Hero Arts Shadow Inks (Tide Pool, Bubblegum, Raspberry Jam, and Charcoal).  I then stamped out the 'ARE A WONDERFUL FRIEND', from the same set, in Versamark Ink onto a vellum panel and heat embossed in Ranger's 'Black Sparkle' powder.  I then punched out some heart confetti, and heat embossed it using Ranger's 'Liquid Platinum', topped in a clear sparkle.  I adhered my little hearts to the front of my vellum panel, and used these areas to place my adhesive on the back so it wouldn't show through when mounted.  I matted onto black card to help the sentiment 'pop', and there you have it.

Now I'm not gonna lie...i LOVE how this card came out, I think it's pretty yet bold.  If you have seen my previous post, I made another card for the same challenge, using pretty much the same techniques, and yet they could not be more different, which I love!  This craft of ours is just soooo versatile.

As always, I'd love to read your comments.

Thanks for your time.

Jillxxx


Simon Says 'Make Your Own Background'...

Hi there,

I'm sharing a couple of cards today which I have made for the, ever awesome, Simon Says Stamp Wednesday Challenge, which this week is, 'Make Your Own Background'.

Simon Wednesday Challenge Blog

And here's my card...


A very simple card, but I think it will work well for those people, we all know, who like a no fuss no nonsense kinda vibe.

I started with a piece of kraft card, and repeatedly stamped out my 'Hello There' sentiment from Hero Arts' 'Heyday sentiment' set, on the diagonal, in Versamark Ink.  When the whole background was covered, I heat embossed the in clear powder, to give this very neutral tone on tone effect.  I then repeatedly stamped the same sentiment along a piece of vellum, this time heat embossing in white, and adhered to the card front with clear dimensional adhesive, camouflaged behind the bolder areas.  I matted onto black card and embellished with a few little pearls (which could be left off for a 'guy' card).

And there you have it.  So simple, but I really like how it came out.  I hope you do too.

As always, I'd love to read any comments so don't be shy, and be sure to check out my next post for a much more feminine take on the same theme.

Jillxxx